Locating Drivers by Search
Lamp driver localisation is the process of locating a lamp driver and assigning it to a channel in an area. If using a floor plan, the localised driver can also be assigned to a fixture icon.
Locating each lamp driver by flashing, walking around the floor to find the flashing lamp, and then assigning the driver to a channel in an area and/or fixture icon, can be a time-consuming process. The Localize Lamps dialog dramatically speeds up this process, enabling you to efficiently locate lamp drivers and assign them to the correct channels in each area and/or fixture icons on the floor plan.
Localise by search can be performed with or without a floor plan.
-
When localising lamps in an area, the system selects lamps that are not currently assigned to any area.
-
When localising lamps on the floor plan, the system selects lamps that are not currently assigned to any fixture icon.
|
New Multi Lamp Mode (Floor Plan Only)
System Builder 4.43+ includes an updated default method for faster localisation of multiple lamps at once. In Multi Lamp Mode, enumerated lamps are turned on or off in a series of patterns and manually flagged as On/Off/Unknown on the floor plan before proceeding to the next pattern. The dialog automatically adds as many steps as required - for example, 8 steps are enough to fully localise up to 254 lamps. You can run the dialog as many times as needed, localising an entire floor at once or repeating the process for each room/area separately to minimise walking back and forth. The dialog will only assign lamps with sufficient data at the end of each process. To toggle between this method and the legacy Single Lamp Mode, simply click the button at the bottom of the dialog box. |
Localise Lamps on a Floor Plan
| Ensure that all controllers are assigned to the correct floor(s) before proceeding. |
Multi Lamp Mode
-
In Building view, right-click a
 floor plan,
  distribution board,
  DALI load controller, or
  DALI line/universe and select
  Localize Lamps… to open the dialog.
|
You can exclude specific load types from the search by selecting one of the three options under Load Types. You can also exclude any load controller from the search by right-clicking the controller in the Unassigned Devices editor and selecting |
-
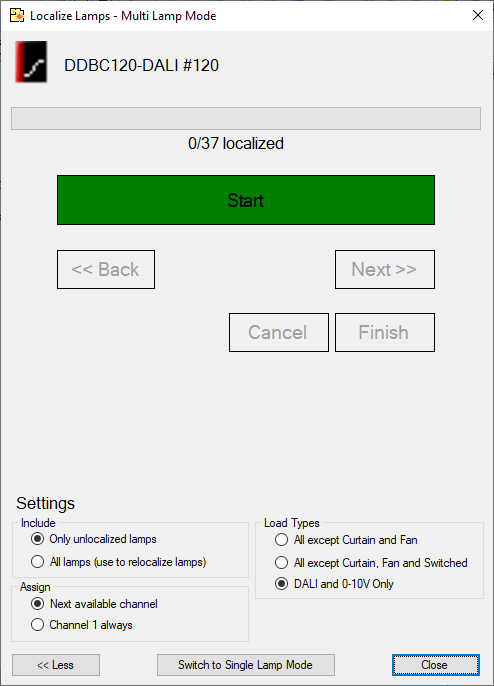
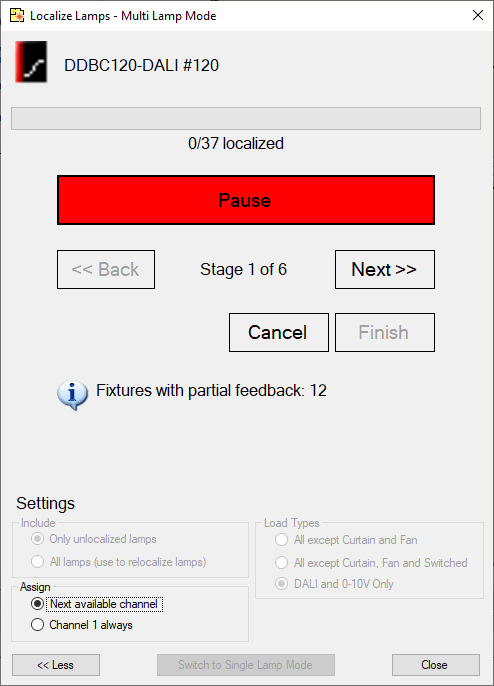
To start localising, click the Start button, middle mouse button, or press Enter. The system turns a selection of unlocalised lamps on/off across the selected floor plan, distribution board, controller, or DALI line/universe. SB plays a tone when it is ready for you to proceed.
|
|
-
Check which lamps are on or off and configure the corresponding fixtures on the floor plan to match.
-
Left-click a fixture to toggle it between On/Off/Unknown.
-
Right-click a fixture to set it to Off.
-
Ensure that only visible lamps/fixtures are set to On/Off.
-
Leave all unchecked fixtures set to Unknown.
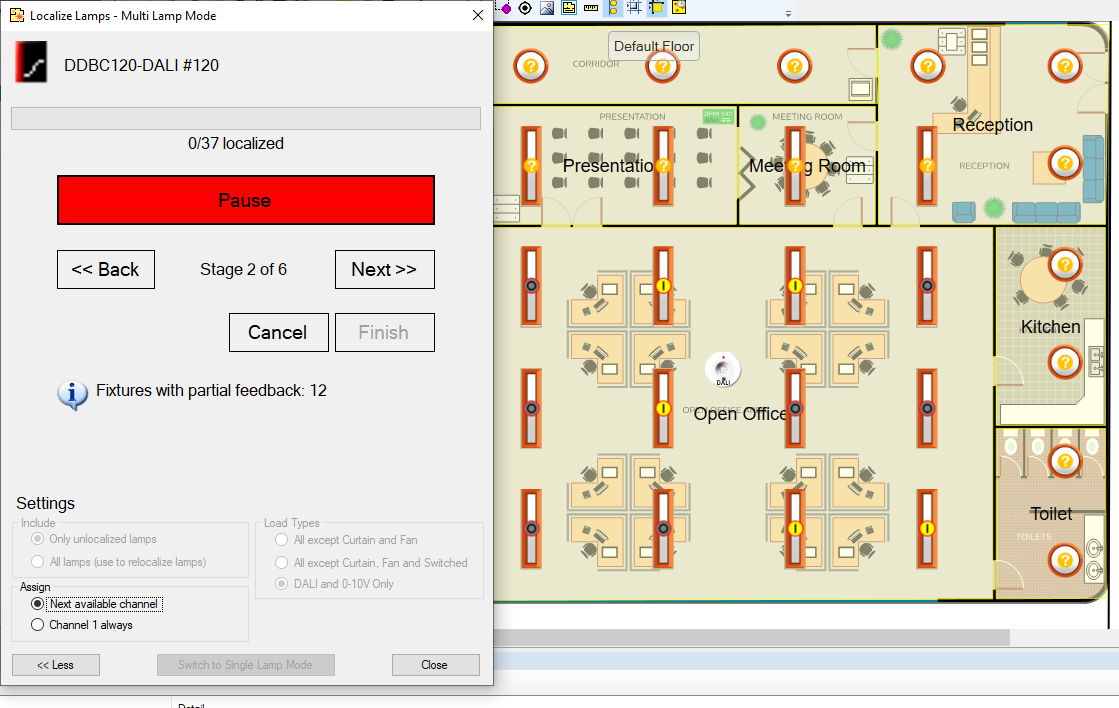
Click to continue, and repeat for as many steps as required.
If you make a mistake, the dialog will alert you and continue while ignoring fixtures with invalid feedback. You can repeat the procedure to localise any missed/ignored lamps. To redo a completed area, select the lamps and right-click to  Remove load control, then restart the procedure.
-
-
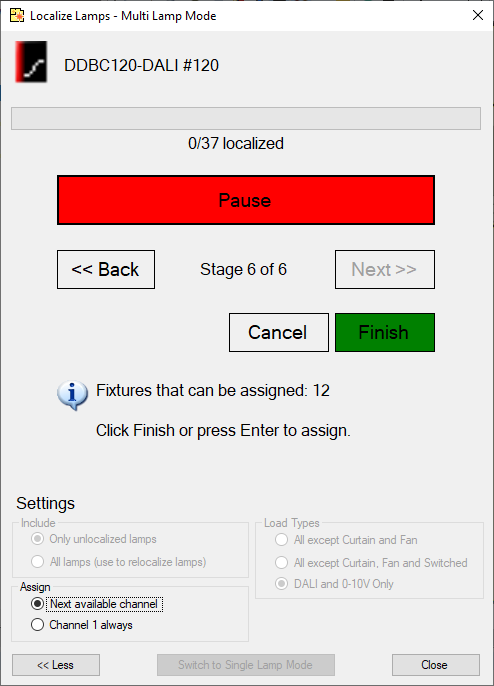
When the final step is successfully completed, SB plays a chime and displays a count of assignable fixtures. Click the Finish button or press Enter to assign these fixtures and close the dialog.
-
Repeat the procedure as needed for additional areas or lamps. When you have finished localising a floor, DALI load controller, or DALI line/universe,
 save the modified configurations to each load controller (F12).
Single Lamp Mode
This method involves physically standing within sight of a specific lamp, verifying whether the lamp is on or off at each stage of the process until SB can identify it, and then moving on to the next lamp and repeating the process. You can also draw a preferred path along the floor plan to localise multiple lamps in a specific order, minimising the amount of walking required.
-
In Building view, right-click a
 Plan,
Plan,  distribution board,
  DALI load controller, or
  DALI line/universe and select
  Localize Lamps… to open the dialog window.
 -
Select a placeholder/fixture icon on the floor plan.
You can manage the localisation process using either the onscreen buttons or mouse clicks anywhere on the window.
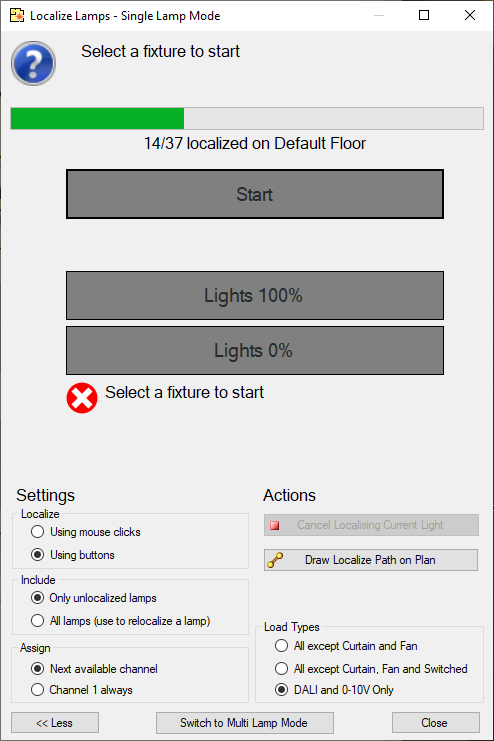
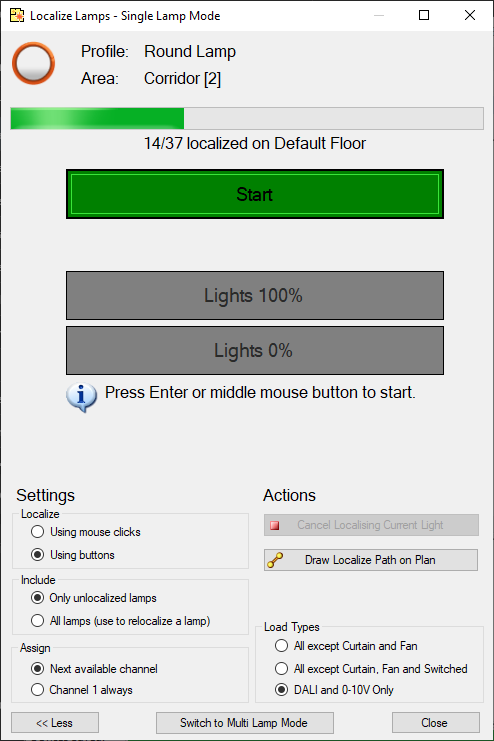
You can exclude specific load types from the search by selecting one of the three options under Load Types. You can also exclude any load controller from the search by right-clicking the controller in the Unassigned Devices editor and selecting  Exclude in Localize Lamps.
-
To enter path drawing mode, select a white fixture from the floor plan or click
 Draw Localize Path on Plan button.
To draw a path, left-click on each fixture icon to join them with a dashed line. As you draw a line, each fixture is highlighted with a dashed circle. Draw the line in the direction that you want to walk when localising. Double-click on an icon to end the current line and begin another line. Right-click to end the current line and exit line drawing mode. You can draw multiple lines on the same plan.
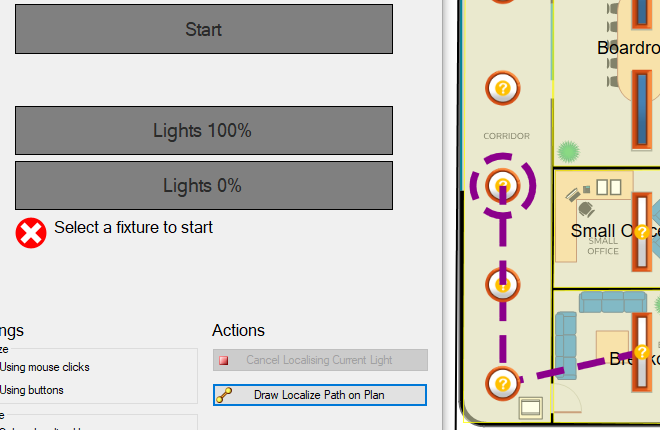
Only one path may join a fixture group and a path may only join to one icon in a fixture group. Note: DALI addressable drivers do not need to be part of a fixture group as they can be grouped logically into channels in the Areas tree. When the line is finished, the starting fixture on the line is marked with a number 1. The localisation will follow the path, starting from 1.
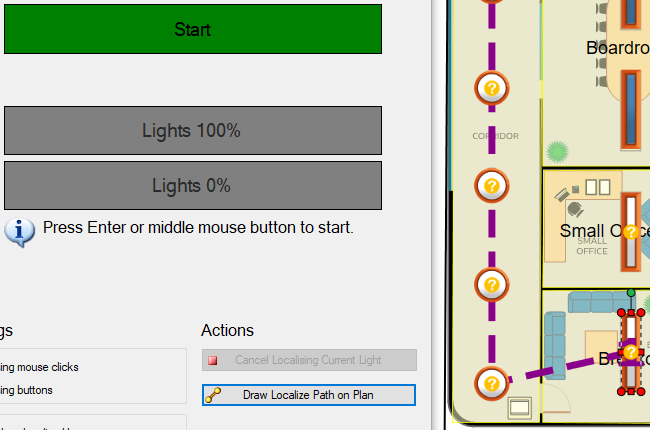
To remove a line, right-click it and select  Remove Line. When the Localize Lamps dialog is closed, all path lines are removed from the plan. Path lines are not saved when the job is saved.
-
To start localising, click the Start button, middle mouse button, or press Enter. The system turns on half the lights on the floor plan, distribution board, controller, or DALI line/universe.
-
If the selected lamp is ON, click the left mouse button, Lights 100% button, or press Y.
-
If the selected lamp is OFF, click the right mouse button, Lights 0% button, or press N.
SB plays a tone to confirm your choice.
If you make a mistake, click . To redo a completed area, select the lamps and right-click to
 Remove load control, then restart the procedure.
 -
-
The system continues toggling lights on and off until it has narrowed the group down to one lamp. When that happens, the lamp is assigned to the icon selected on the floor plan. The fixture fill is updated to the current light level and SB plays a tone to confirm the assignment.
-
If you have drawn a path, the next fixture on the line is automatically selected, or click on the next fixture that you want to localise.
-
Repeat this process for all unlocalised lamps.
-
When you have finished localising a plan, DALI load controller, or DALI line/universe,
 save the modified configurations to each load controller (F12).
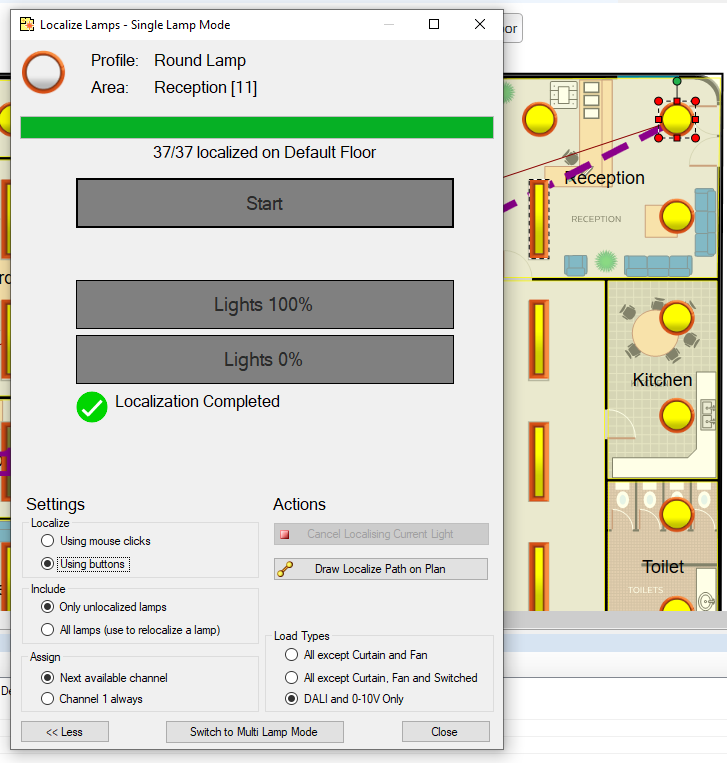
| You can select any fixture icon on the floor plan to begin localising with or without a path. |
Localise Lamps in an Area (No Floor Plan)
-
In Areas view, right-click an area and select
 Localize Lamps… to open the dialog window.
 -
To start localising, click the Start button, middle mouse button, or press Enter. The system turns on half the lights on the floor plan, distribution board, controller, or DALI line/universe.
-
If the selected lamp is ON, click the Lights 100% button, left mouse button, or press Y.
-
If the selected lamp is OFF, click the Lights 0% button, right mouse button, or press N.
SB plays a tone to confirm your choice.
If you make a mistake, click . To redo a completed area, expand the area tree to show the drivers/circuits in the area, right-click each driver/circuit and select , then restart the procedure.
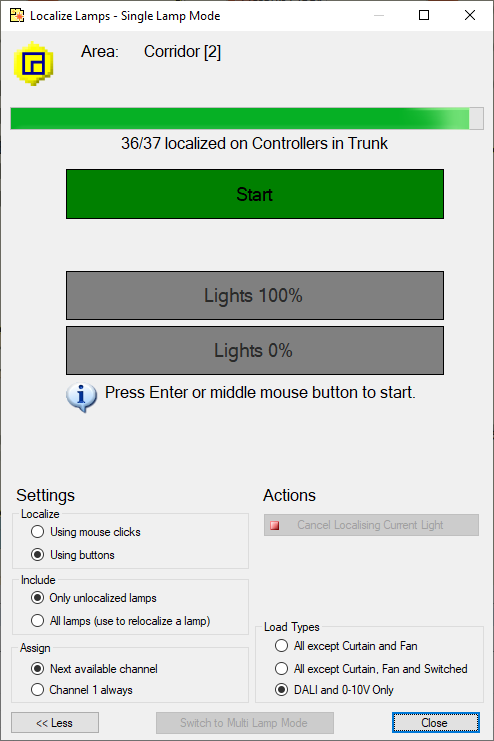
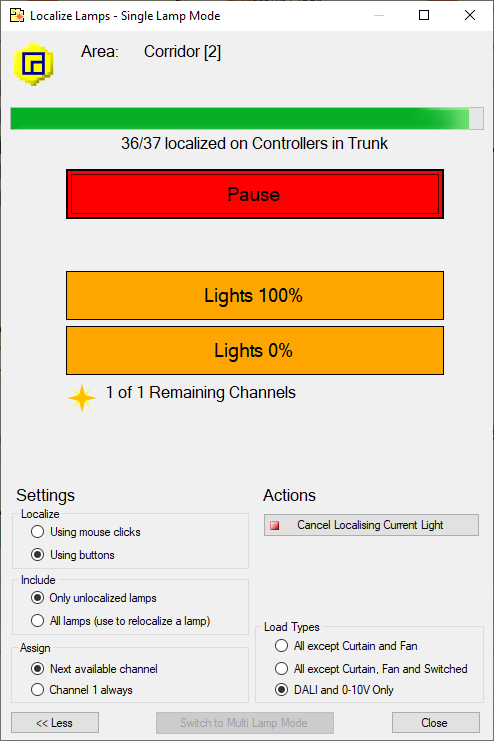
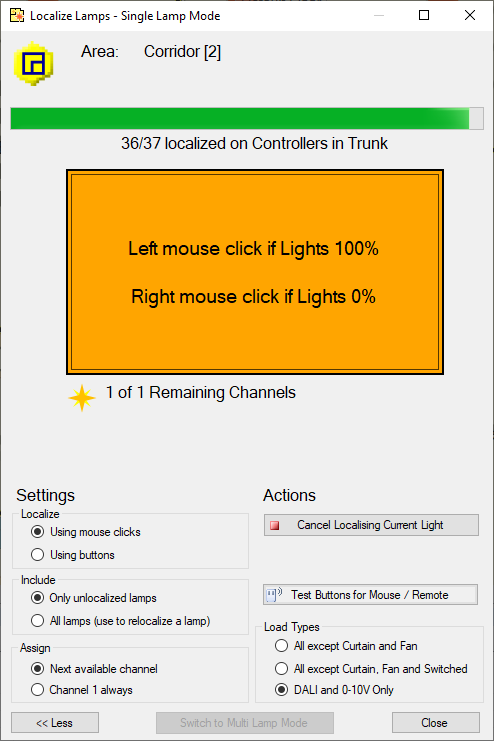
-
-
The system continues flashing lights until you have narrowed it down to one lamp, which is then assigned to a channel in the area. SB plays a tone to confirm the assignment.
-
Repeat this process for the remaining unlocalised lamps in the area.
-
When localising the area is complete, right-click the area and select
 Save Modified Devices in Area
|
You can exclude specific load types from the search by selecting one of the three options under Load Types. You can also exclude any load controller from the search by right-clicking the controller in the Unassigned Devices editor and selecting |
|
Remote Control
Localising can be controlled with a mouse, keyboard, or third-party input device such as a Bluetooth presentation pointer or phone app that uses media player keys as control inputs. If WiFi is not available at your site, you can configure your phone as a local WiFi hotspot. PowerPoint slideshow control buttons map to the procedure as follows:
You can customise lamp localisation behaviour in Tools > Settings > User Settings > Localize Lamps. 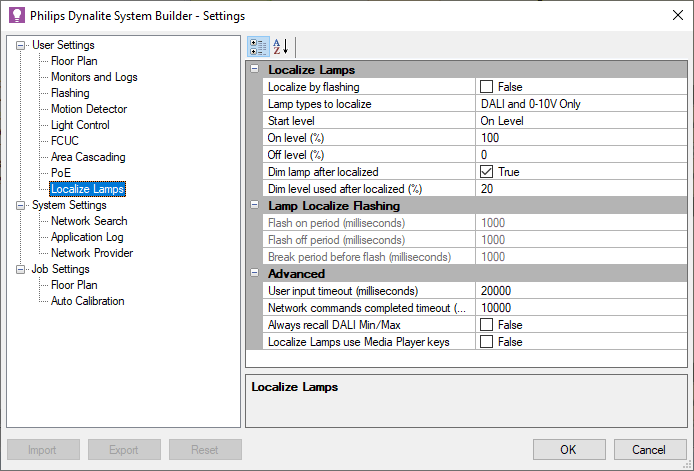
|