Schedules
The Schedules editor creates and deploys event schedules to the device, that are triggered by the internal real-time clock. A series of actions can be defined to run when the schedule is active. The user can also edit, enable, or disable schedules directly on the device itself.
|
If you think there are existing schedules in the device, you should click |
The following settings apply to all schedules in the Schedules editor:
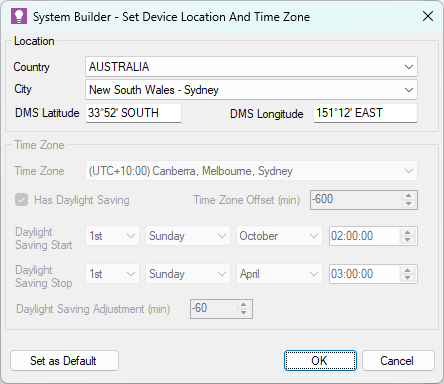
The button opens the Set Device Location and Time Zone dialog. From here you can change the location and time zone for the device, if different from your current location.
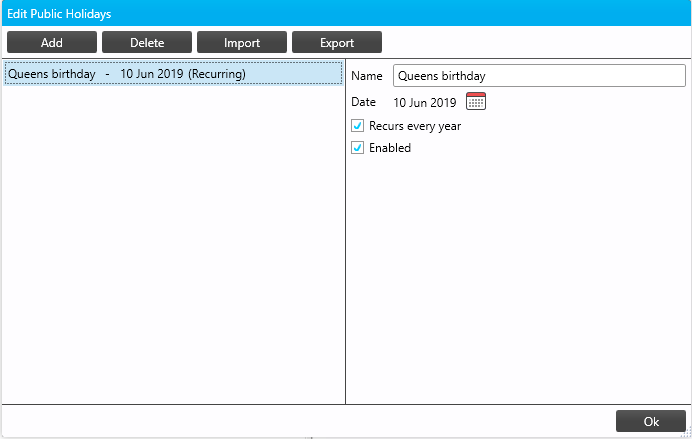
The button opens the Edit Public Holidays dialog, where you can , , (.xml or .ics), , and edit public holidays for your region. You can configure individual schedules to include/exclude public holidays.
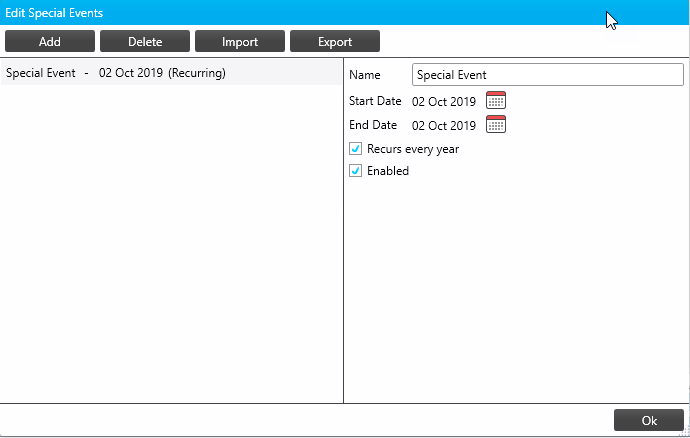
The button opens the Edit Special Events dialog, where you can , , (.xml), , and edit special events for your region. Special events temporarily override normal operational schedules.
Managing Schedules
-
In System View, select the device and open the Schedules tab.
-
Click the button to add a new schedule to the list.
-
You can now edit the Schedule Properties.
| After selecting a schedule, click the button to create a copy with the same properties, or the button to remove the schedule. If you are connected to the device, you can click the button to test the schedule. |

-
Select a schedule from the list and modify the following as required:
| Property | Description |
|---|---|
Name |
Enter a unique title |
Number |
This automatically assigned identifier is used to specify the schedule in tasks, actions, and system messages. |
Enabled |
Tick/untick the checkbox to enable/disable the schedule. Disabled schedules can be enabled via a DyNet message. |
Disable until… |
To delay activating an enabled schedule, tick this checkbox and click the |
Unused |
If ticked, schedule is permanently disabled. This option overrides the Enabled status. Unused schedules cannot be enabled via a DyNet message. |
Suspendable |
If ticked, the schedule can be disabled via DyNet message. |
| Property | Description |
|---|---|
Begin |
Click the |
End |
Leave unticked to run the schedule indefinitely, or tick and then click the |
Days of the week |
Click Configure and select All or specify which days to run the schedule. |
Dates of the month |
Click Configure and select All or specify which dates to run the schedule. |
Weeks of the month |
Click Configure and select All or specify which weeks to run the schedule. |
Months of the year |
Click Configure and select All or specify which months to run the schedule. |
Public Holidays |
Click Configure and select Include All or Exclude All public holidays. To only run the schedule on public holidays, select Include All and set the Days/Dates/Weeks/Months above to None. Click Configure > Edit to open the Edit Public Holidays dialog. |
Special events to include/exclude |
Click Configure and select which special event dates to include/exclude. The schedule WILL run on INCLUDED dates, even if it would not usually run on that day. The schedule WILL NOT run on EXCLUDED dates, even if it would usually run on that day. To only run the schedule on the included special event days, select All and set the Days/Dates/Weeks/Months above to None. |
Schedule Type |
Start and Stop times can be absolute or relative to sunrise/sunset. |
|
Schedules must satisfy all Day/Date/Week/Month conditions to run. Irrelevant date/time conditions should be left set to All. Public holiday and special event day settings, if configured, always take precedence. Schedules do run on included days and do not run on excluded days, regardless of other settings. |
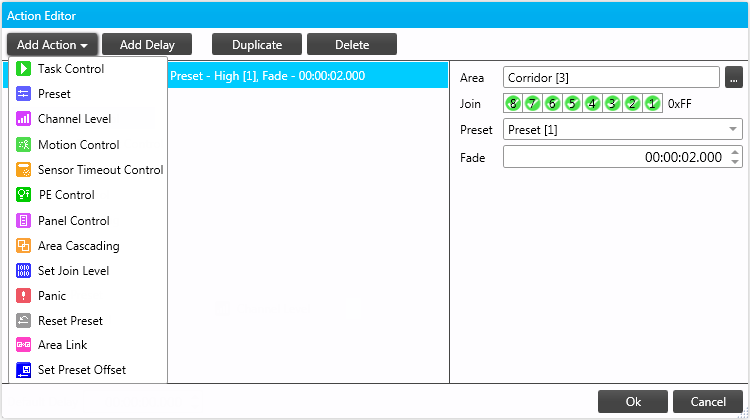
Start/Tick/Stop Actions
-
Click the button to open the Action Editor.
-
Click the button and select an action from the dropdown list.
-
Edit the action properties on the right-hand side.
-
If required, click the button to pause for a specified interval between actions.
-
Repeat as required to add additional actions. You can also select an action and click to add an identically configured copy to the sequence.
-
When finished, click the button to save your changes and close the editor.