System Manager Installation
-
System Manager and associated installation files
-
Room mapping table
-
Hotel job file

Install database management software
Multiroom System Manager requires database management software for the HospitalityDashboardDb, UserManagementDb, EnergyDb and DataAccessDb databases. You must install the database management software and configure Internet Information Services (IIS) before installing other System Manager components.
-
PostgreSQL database, version 12 or 13.
Download the PostgreSQL installation package from https://www.postgresql.org/download/windows/ -
Microsoft SQL 2019 database or later.
This may be used where the hotel has an existing Standard or Enterprise license. For more information on downloading and installing Microsoft SQL server, please refer to https://www.microsoft.com/en-au/sql-server/sqlserver-2019.
|
Databases can be configured to be local (on the SM Server machine) or remote (on another machine on the customer’s LAN). Please refer to Dynalite FAQ #477 - How can I connect System Manager to a Remote SQL Database. If using SQL on a different machine from the System Manager Server, you will need to note the following:
|
-
Right click the PostgreSQL setup file from an explorer window and select Run as administrator to open the PostgreSQL Setup Wizard.
-
Click Next > in the PostgreSQL Setup Wizard.
-
Click Next > for Installation Directory.
-
Click Next > for Select Components.
-
Click Next > for Select Data Directory.
-
Enter database superuser password and retype to confirm.
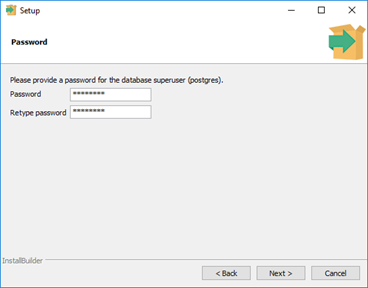
The database management software password is encrypted so ensure you store a copy of the password in a secure location for future reference. The password is required later when installing System Manager. -
Click Next > for Select Port Number.
-
Click Next > and Select Your Language and Location, if applicable.
-
Click Next > for Display Pre-Installation Summary.
-
Click Next > for Ready to Begin Installation.
-
Untick the Launch Stackbuilder checkbox and click Finish.
Configure IIS
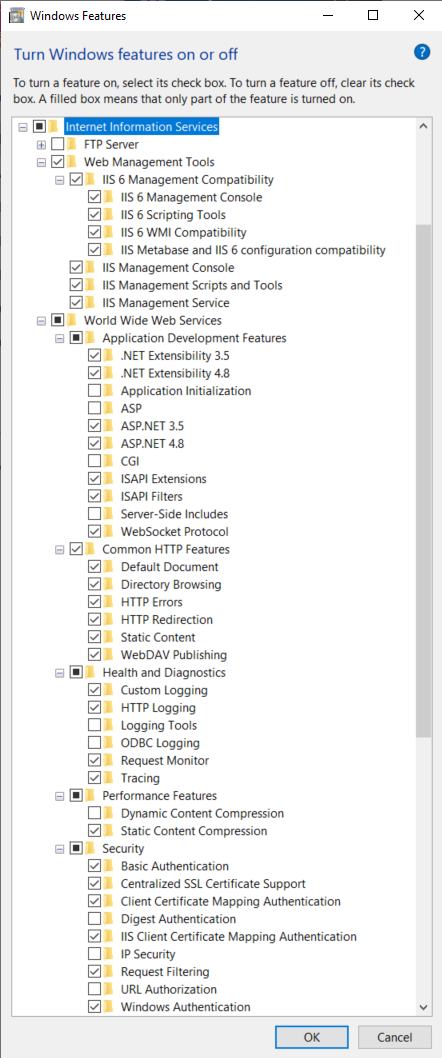
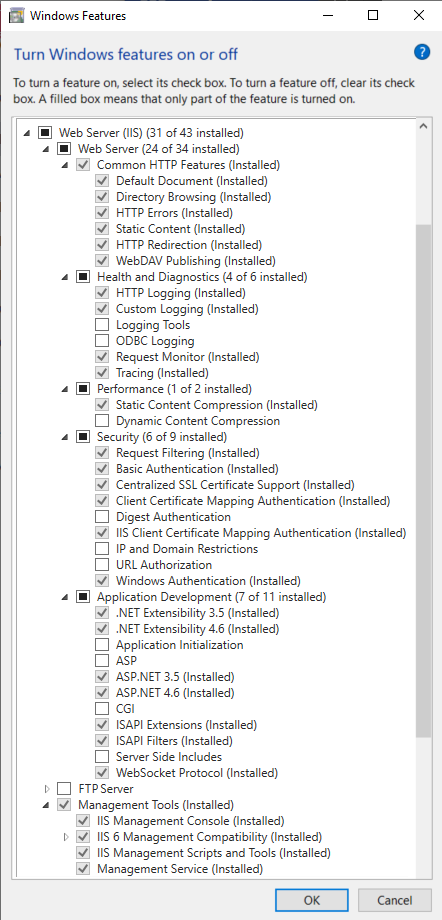
On the SM Server, open Windows Control Panel > Programs and Feature > Turn Windows features on and off.
Click the checkbox to enable Internet Information Services, and additional checkboxes as appropriate for your operating system.
Install SM prerequisites
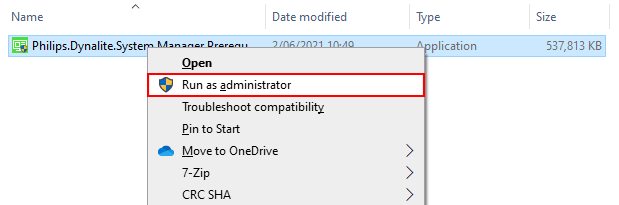
In Windows Explorer, right-click the System Manager Prerequisites setup file and select Run as administrator (Philips.Dynalite.System.Manager.Prerequisites_v1.5.0.2.exe).
Once the prerequisites are installed, the wizard ends automatically.
|
SM Prerequisites installs Microsoft SQL Express 2019 (not used for Multiroom) and creates the instance “\EMSERVER". This is installed by default and must be uninstalled if using Microsoft SQL 2019 Standard or Enterprise. If required, Microsoft SQL databases can be encrypted. For more information on Microsoft SQL 2019, please refer to the relevant Microsoft documentation. |
Install Multiroom System Manager
| Ensure that you install Multiroom System Manager (not Dynalite System Manager) package. |
-
Right-click the installer (.exe) and select Run as administrator.
-
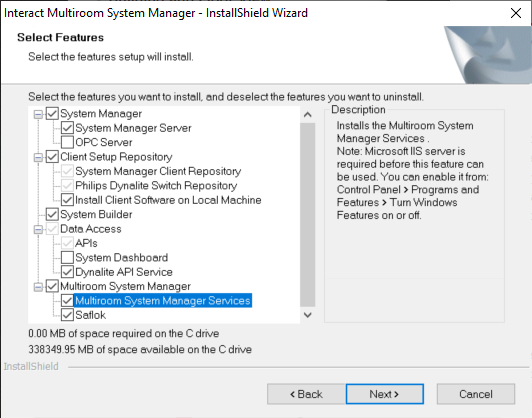
Select the program features to install and click Next >, then click Install.
-
Click OK. This message confirms that the three standard System Manager Microsoft SQL Express databases are set up (these are not used for Multiroom).
-
Select the database management system (default: PostgreSQL).
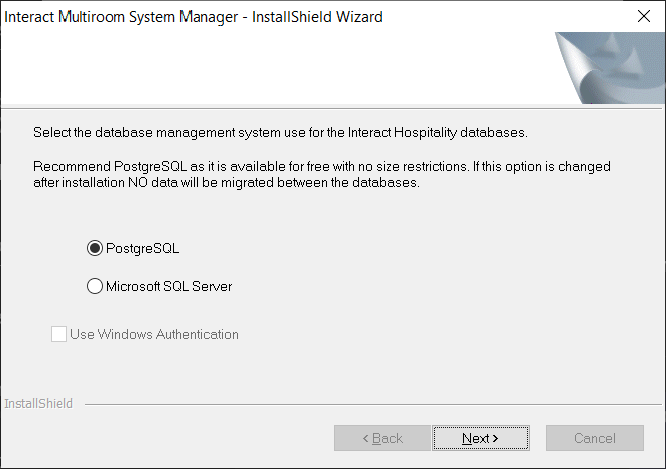
For more information on using Microsoft SQL Server with Multiroom System Manager, please refer to Dynalite FAQ #682 Set up Multiroom System Manager to use Microsoft SQL 2019 Standard/Enterprise edition. If you have made an incorrect database server selection, you can change from MSSQL back to PostgreSQL by modifying the System Manager installation from Windows - Programs and Features and change the selection (No data shall be migrated). -
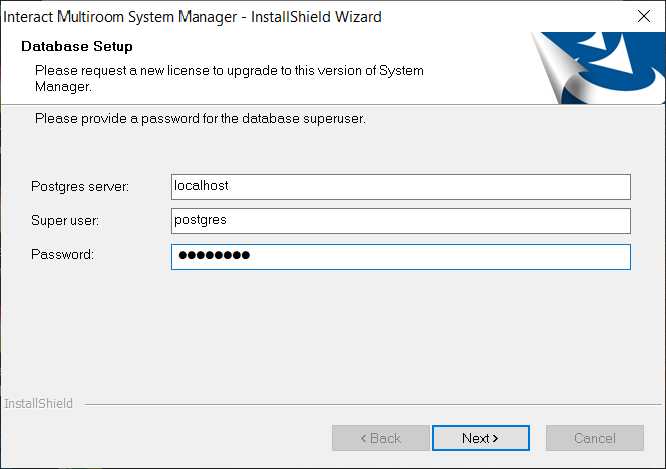
When prompted, enter the password previously created for the PostgreSQL database super user account and click Next >.
-
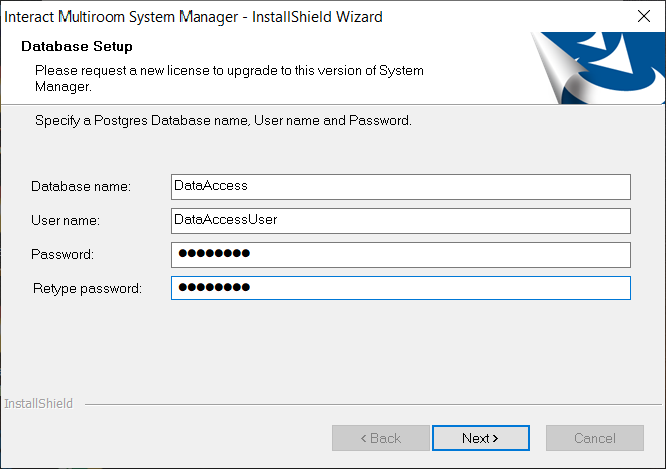
To create the Database name and User name, enter the same password twice and click Next >.
-
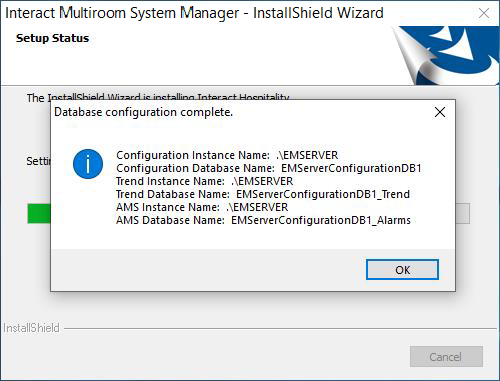
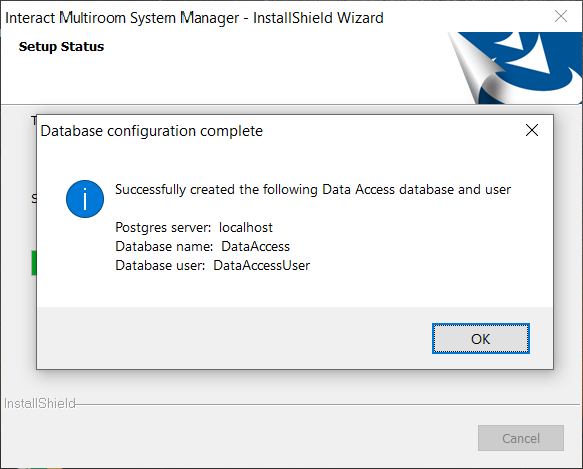
After the wizard has successfully created the Data Access database and user, click OK.
The installer will install the remaining System Manager components.
-
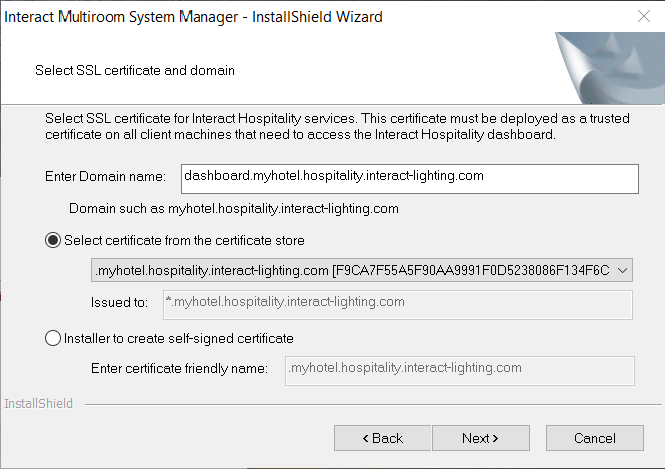
To provide browser access to the Dashboard and APIs via your own domain: select the SSL certificate and enter the domain name, then click Next >. We recommend selecting a certificate from the certificate store (supplied by the hotel), or the wizard can create a self-signed certificate for the specified domain.
Spaces are not allowed in the certificate friendly name.
A self-signed certificate created by the installer is updated in IIS Server certificates (expiration is 2 years from current date).
-
Click Yes to confirm the URL.
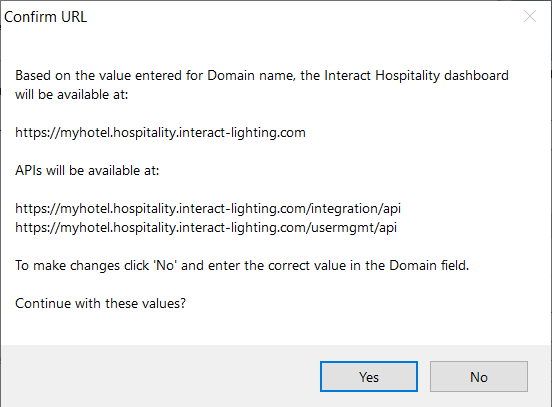
The domain name must have a minimum of three parts, e.g. myhotel.example.comDomain names either need to be registered by IT on their DNS servers, or on each client machine’s hostsfile, to resolve the domain name to the SM server IP address.The certificate and domain can be changed later by rerunning the install package, or by opening the  Data Access Service Configuration app.
Only the Interact gateway URL (e.g.
https://dashboard-local.hospitality.interact-lighting.com) is required to be trusted on client PCs. This is the only address that is accessible via the local network. After installation you can find the gateway URL in Windows IIS. This is the URL for all dashboard, API, and WebSocket connections. The gateway then routes requests to the individual APIs as in the example table below:Domain IP:Port Local/Remote https://myhotel.hospitality.interact-lighting.com[SM server IP address]:443Remote
https://api.hospitality.interact-lighting.com127.0.0.1:443Local
https://usermgmt.hospitality.interact-lighting.com127.0.0.1:443Local
https://dashboard-local.hospitality.interact-lighting.com127.0.0.1:443Local
https://energyapi.hospitality.interact-lighting.com127.0.0.1:443Local
https://dynalitecontrolapi.hospitality.interact-lighting.com127.0.0.1:443Local
https://publicapi.hospitality.interact-lighting.com127.0.0.1:443Local
-
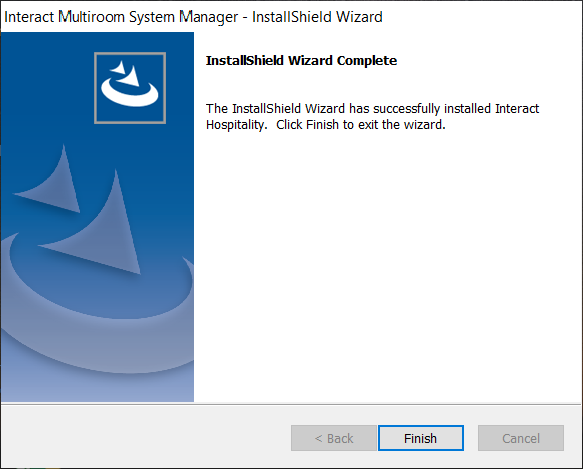
Click the Finish button to complete the installation.
Data Access Configuration
| If you have followed the Multiroom SM installation wizard steps, you are not required to make any changes to Data Access Configuration. |
You can access Data Access Configuration via the Windows Start Menu under Philips Dynalite > ![]() Data Access Service Configuration to make changes to the database settings and credentials.
Data Access Service Configuration to make changes to the database settings and credentials.
The Data Access Configuration window shows the current Data Access Service Status and buttons for each section.
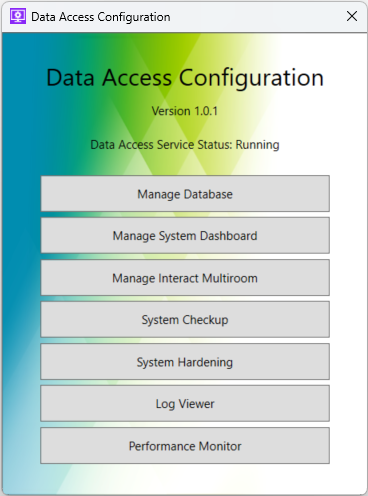
The Manage Database dialog provides settings to select the database type, server address, and superuser credentials that were entered during the SM installation process.
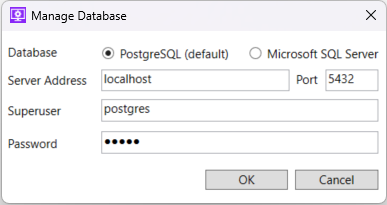
Do not change these settings, they are not relevant to Multiroom System Manager.
The Interact Multiroom Configuration window includes buttons to access URLs Overview, Certificate Configuration, and Manage Multiple System Managers.
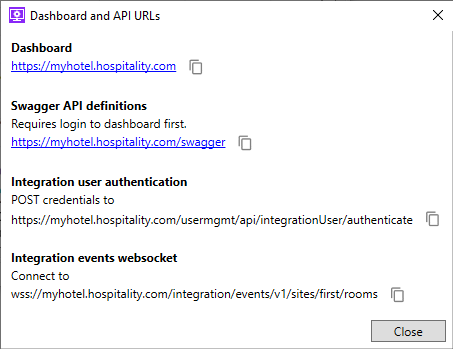
The URLs Overview dialog shows the current Dashboard and API URLs for your system. Click the links to launch them in your browser. Click the ![]() icon to copy the URL to the clipboard.
icon to copy the URL to the clipboard.
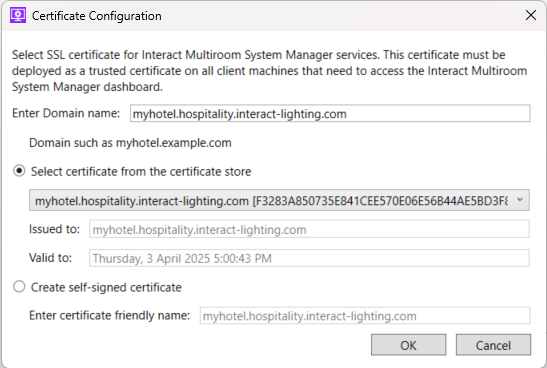
The Certificate Configuration dialog allows you to configure the host name and domain of the multiroom dashboard and APIs, and to select or create an SSL certificate for the webserver.
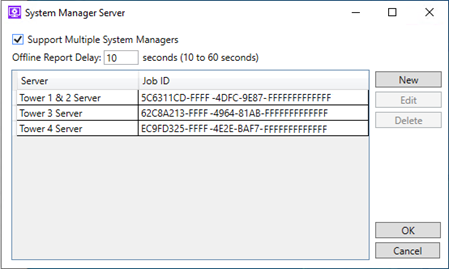
The System Manager Server dialog enables you to link multiple SM servers that may be required for very large sites with thousands of rooms. Data from all SM servers is integrated into a single Multiroom Dashboard.
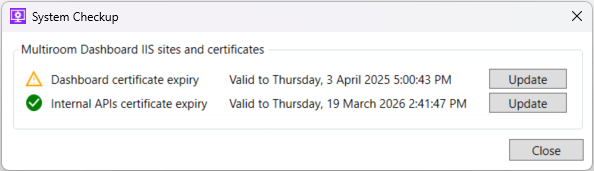
The System Checkup dialog box shows notifications of upcoming certificate expirations so you can update the relevant certificates.
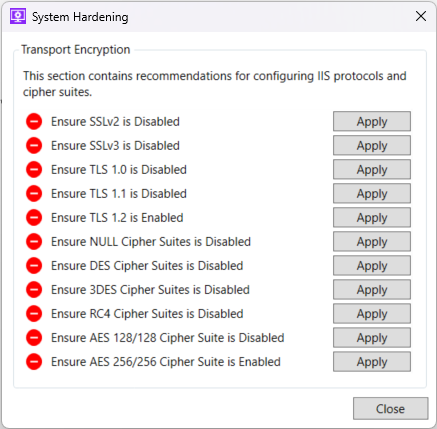
The System Hardening dialog provides a list of security recommendations that you can apply to the server machine.
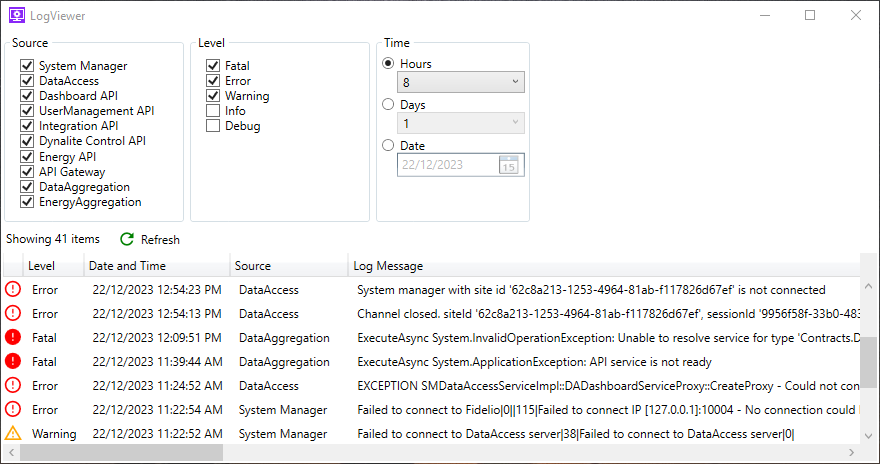
The Log Viewer dialog combines log messages from multiple text file logs on the server machine. Logs can be filtered by service, message level, time, and date.
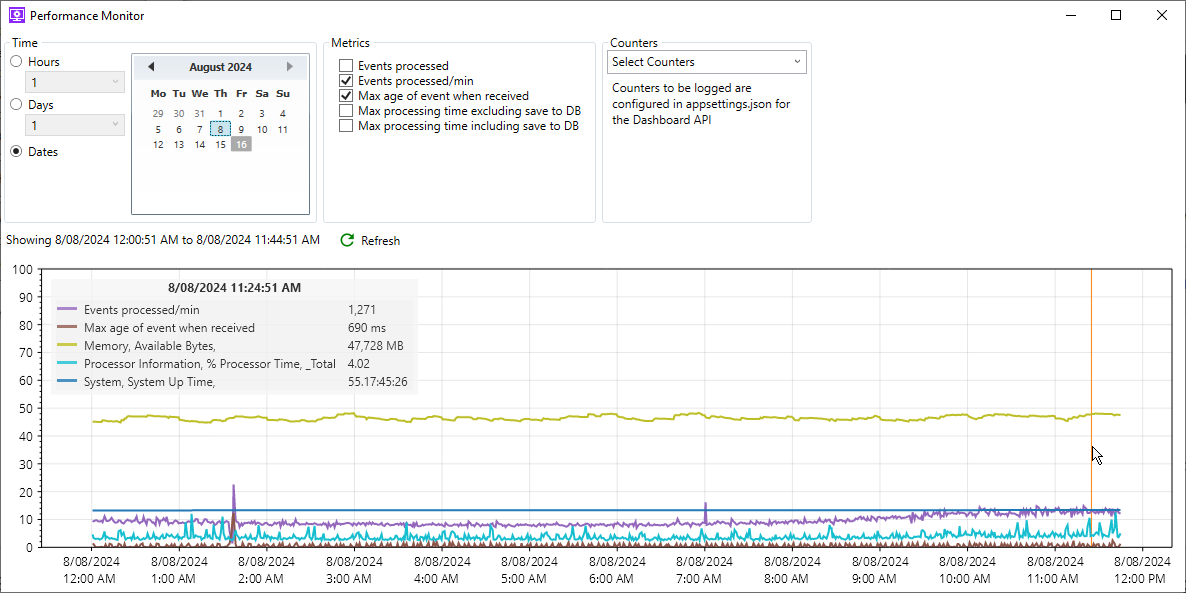
The Performance Monitor dialog shows graphs of application and service performance metrics. You can add time filters, and select different metrics or counters to be logged. Some built-in metrics are available, and any Windows Performance Counters available on the machine can be configured to be logged and displayed.
Check SM Server Operation
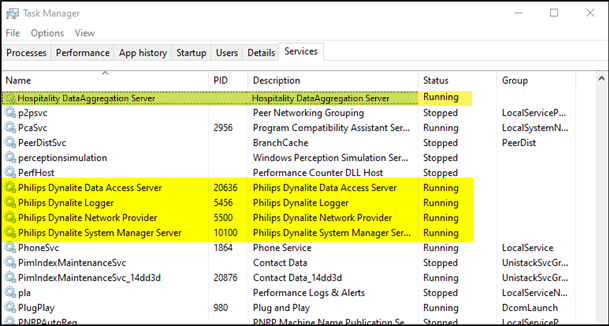
In Windows Task Manager Services, ensure that the four Philips Dynalite System Manager services are running.
If the system is connected and there is live data going into the TrendDB, then you can check C:\ProgramData\Dynalite\DataAccess\Logs\DataAccessServer.log to see incoming sync messages.

Install SM clients, if applicable
| The client software is not required for hotel staff but may be required for engineering staff. The initial superuser account on the server is likely to be sufficient for most installations. |
You can install multiple versions of the client software on different PCs to access System Manager Server.
-
Copy the installation files located in the following folder on the SM server:
C:\Philips Dynalite\System Manager\System Manager Client -
Run setup.exe on the user’s PC.
-
In Windows, click
 System Manager to open the System Manager client.
Security Hardening
Ensure that you perform system and OS hardening to prevent unauthorized access to the system.
-
For information on hardening the Windows server, please refer to the OS Hardening Guide.
-
For information on hardening Philips Dynalite System Manager software and hardware devices, please refer to the System Hardening Guide.