Configure PDZG-E Wireless Gateway
You will now configure the PDZG-E for Zigbee and secure TCP communication.
| The PDZG-E initially appears as offline in SB, and will not respond to messages from the trunk or other devices until it is configured. The device is factory-set with a TCP server port for direct connection from SB to complete this process. |
-
In System view, right-click the PDZG-E and click
 Connect.
-
Right-click the PDZG-E and click
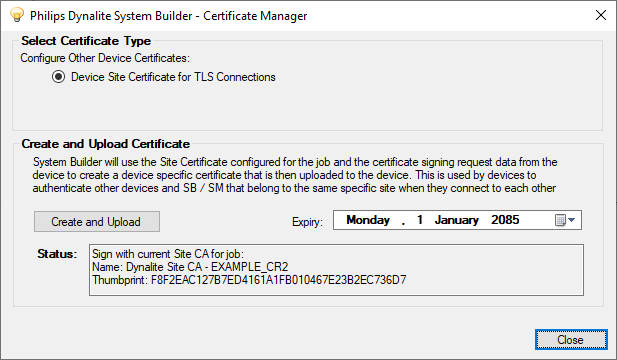
 Manage Certificate… to open the Certificate Manager dialog.
 -
Click the button.
-
Click the button to return to SB.

The ![]() green padlock icon next to the PDZG-E indicates that it now has a security certificate.
green padlock icon next to the PDZG-E indicates that it now has a security certificate.
-
With the PDZG-E selected, open the Ports editor.
-
In the properties pane, set IPv4 > Use static IP address as needed:
-
True if using a static IP.
The IP Address, Gateway, Subnet mask, and DNS server should be provided by the site’s network administrator to avoid conflicts with other devices. -
False if using DHCP.
We recommend ensuring that the PDZG-E has a permanently reserved IP address on the DHCP server.
-
-
Select a Zigbee > Zigbee Channel Number.
We recommend using channel 25 for the first PDZG-E in each physical space. If additional gateways are required in the same space, use channels 20 and 15 to minimise interference from overlapping signals on the same frequency. -
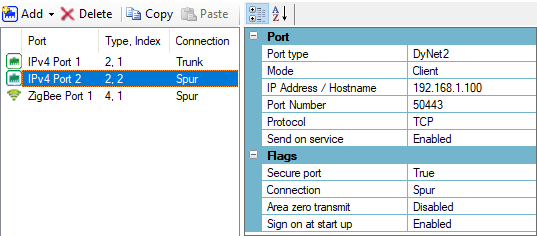
Confirm that there is an IPv4 port with the following settings:
-
Port type: DyNet2
-
Mode: Client
-
IP Address / Hostname: The PDDEG-S IP address (e.g. 192.168.1.100)
-
Port Number: 50443
-
Secure Port: True
If the port does not exist, click
 Add >
Add >  IPv4 Port and configure as required.
-
-
Click
 Save to Device (F12).
-
In the System tree, right-click the top entry and click
 Connect.
 -
Select the PDZG-E and click
 Send Device Sign-On (F6).
 -
If successful, a flashing
 icon shows next to the PDZG-E. You can continue the rest of the configuration from the trunk connection.
| If adding more than one PDZG-E to the job, ensure that each device has a unique name in the Device Properties editor under Device Identification > Device name. |