Locating and Assigning Circuits
In the Areas tree or from the floor plan, create the areas and channels for your project. You can then use the following methods to identify and locate circuits in the job using the ![]() Flash command, and assign each circuit to the correct logical area and channel.
Flash command, and assign each circuit to the correct logical area and channel.
Locating Circuits
-
Select the controller.
-
Click
 Flash and
  Stop Flash (F7) to locate all circuits.
 -
If required, right-click and
 Rename the controller.
-
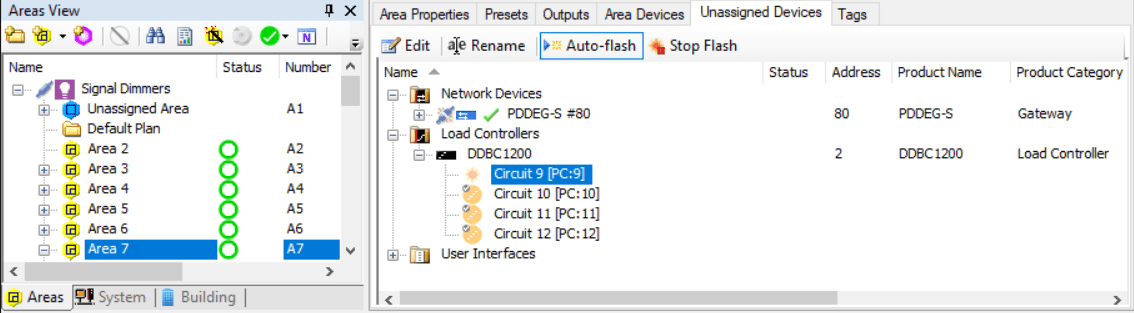
Select the area and open the Unassigned Devices editor.
-
Select a circuit connected to a load controller.
-
Click
Flash and Stop Flash (F7) or  Auto-flash to locate the circuit.
 -
Click
Rename to provide a meaningful name for the circuit, if required.
-
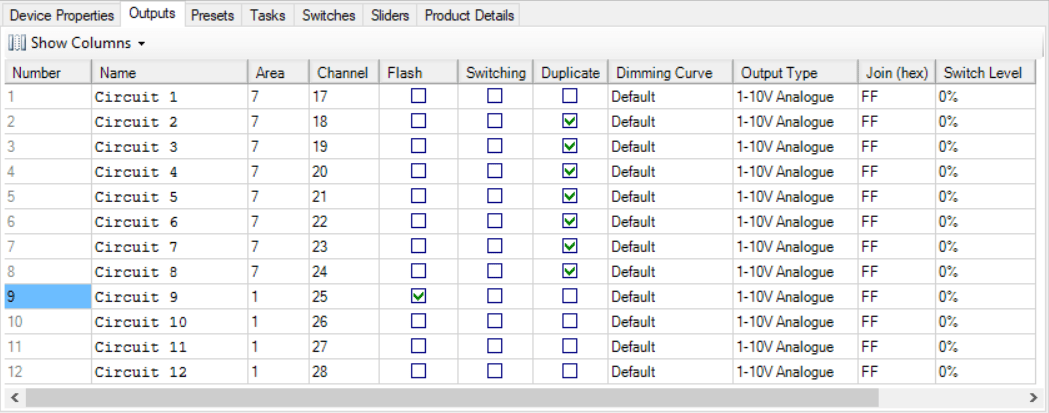
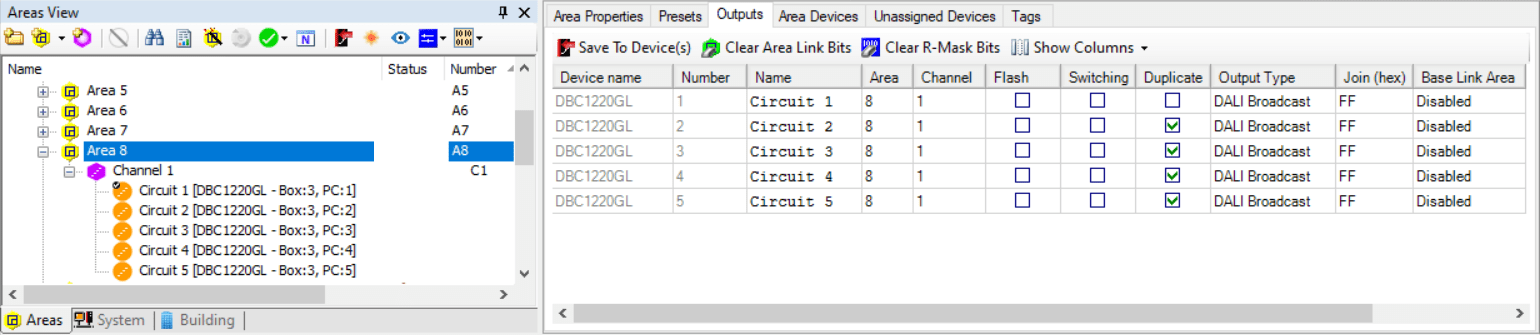
Select a controller and open the Outputs editor tab.
-
In the
Flash column,  select and
  deselect the checkbox for the specified circuit to locate the circuit.
 -
To rename a circuit for easier identification, click the Name cell to select it, then click it again to edit.
| Turn off all the lights, then flash. If nothing happens, you know the circuits are not in any of the visible areas. This is a good way to exclude large groups. |
Assigning circuits to areas and channels
Circuit assignment
Once you have located a circuit by flashing, you need to assign it to an area and channel to complete localization. Alternatively, you can assign a circuit to an area with the Localize by search procedure. For more information on Localize by search, refer to Locating drivers by searching.
-
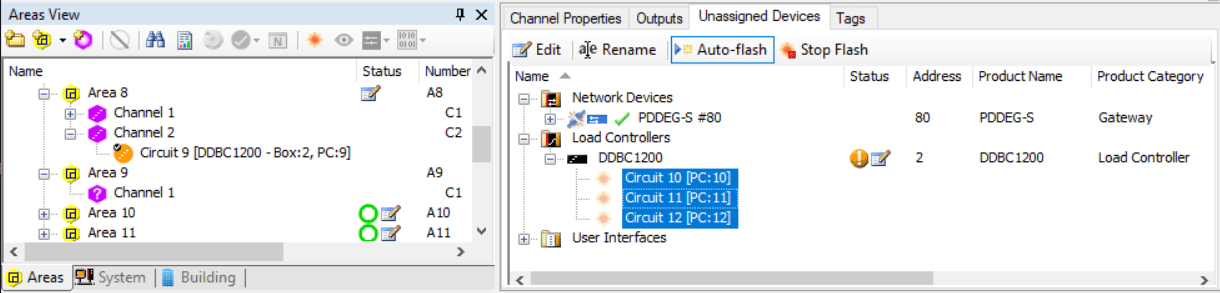
In Areas view, open the Unassigned Devices editor.
-
Either:
-
Click and drag each circuit from the Unassigned Devices editor to an area. The circuit is assigned its own channel.
Or:
-
Click and drag each circuit from the Unassigned Devices editor to an existing channel in an area. The circuit is added to the channel together with other previously assigned circuits.
-
If not already renamed, then the circuit takes the name of the area and channel to which it is assigned, or you can right-click an assigned circuit and select Rename.
-
Assign all remaining circuits on the controller to their respective areas and channels.
-
-
Click
 Save to Device (F12).
Dragging from Unplaced creates channels.
-
Select the required area or channel.
-
In the Areas view toolbar, click
Flash (F7) to confirm correct assignment. -
All circuits assigned to the area or channel will flash.
-
If circuit assignments are incorrect, reassign circuits as required.
Setting the master circuit
To make different circuits work together, more than one circuit can be assigned to the same channel, however only the first one will act as the master for control purposes. This means that on a channel only one circuit will respond to channel level requests.
Setting the master circuit is optional, as System Builder automatically selects a master circuit for each channel.
-
 Master circuit
 -
 Duplicate circuit
-
In Areas view, click and drag the required
circuits into the same  channel.
 -
Right-click a circuit and select
 Set Master Channel.
|
Other circuits assigned to the same channel will automatically have a |
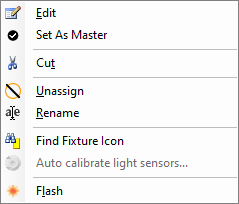
Right-click the circuit to view the circuit context menu. The context menu can be used to access the following functions: