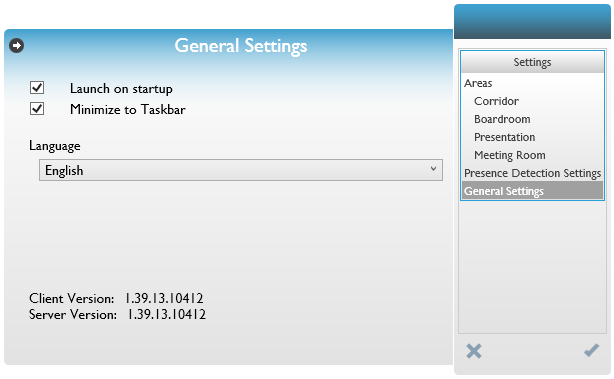
Settings
Click the  Settings icon.
There are three groups of settings:
-
Areas - select lighting control areas and the preset fade time for all presets.
-
Presence Detection Settings - links Switch to the computer’s screensaver state, controlling the lights in response to user presence.
-
General Settings -
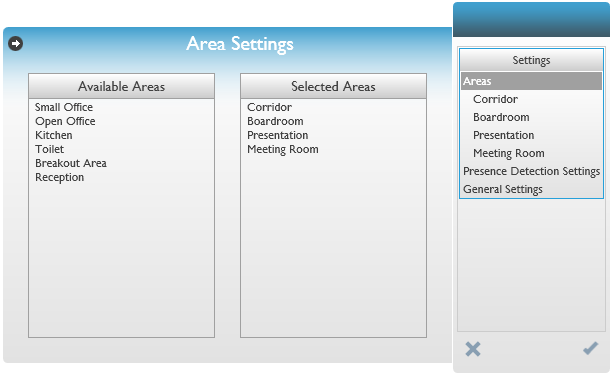
Areas
Two area lists are displayed:
-
Available Areas - these are loaded from the System Manager site map.
-
Selected Areas - these are the lighting control areas chosen by the user.
-
Drag and drop (max. 4) Available Areas to the Selected Areas list.
-
Click ✓ to finish.
Area settings
-
Select an area in the Settings pane to display its presets, channels, and fade time in the collapsible right pane.
-
Select Presets to display for that area.
-
Select Channels to display for that area.
-
Enter the desired Preset Fade Time.
-
Repeat these steps for each area.
-
Click ✓ to finish.

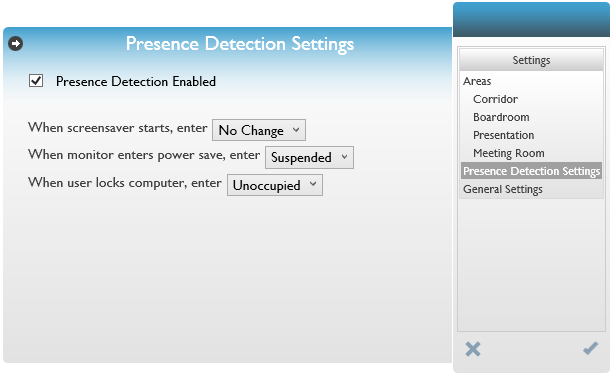
Presence Detection Settings
|
Presence detection must first be enabled for at least one area in |
There are three user presence states supported for every area on the floor plan:
-
Occupied - Switch client is running and the computer is being used.
-
Suspended - Switch client is not active and the windows screensaver is running.
-
Unoccupied - Switch client is not logged in.
These states trigger the preset scenes defined in ![]() System Manager Configuration > Site Settings > Presence Detection.
System Manager Configuration > Site Settings > Presence Detection.
When no events are triggered, Switch remains in the Occupied state.
-
Tick the Presence Detection Enabled checkbox to activate this feature.
-
Select the desired user presence state (Suspended, Unoccupied, or No Change) for each of the following events:
-
When screen saver starts
-
When monitor enters power save
-
When user locks computer
-
-
Click ✓ to finish.
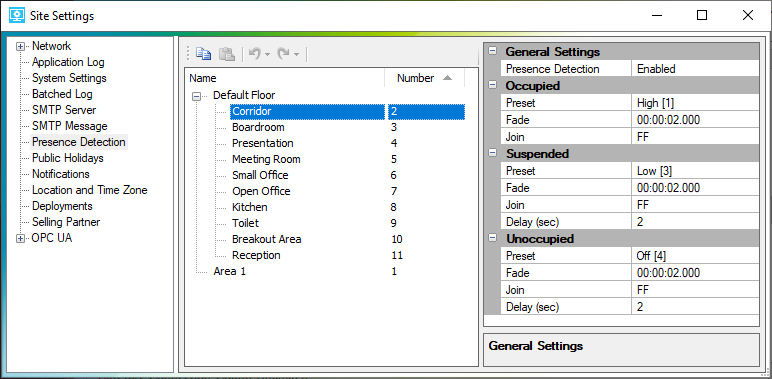
System Manager Configuration
-
In
 System Manager Configuration, click the button.
 -
In Site Settings, click Presence Detection.
-
Select the required area from the list.
-
In the Properties pane on the right, set Presence Detection to Enabled.
-
Select the presets for the Occupied/Suspended/Unoccupied states (default: High/Low/Off).
If required, preset lighting levels for each area can also be changed in Switch by editing the preset. -
Repeat these steps for each area that requires presence detection.