Physical Devices
Connecting to DyNet
Before you can start commissioning, you must first connect SB to the control system network.
A PC node adapter is required to connect SB to DyNet over RS-485. The PC node adapter plugs into the USB on the PC and then into the DyNet port of a device in the network.
An Ethernet cable or Wi-Fi connection is required to connect SB to DyNet over IP. SB can communicate using a IPv4 or IPv6 TCP/IP connection.
You can connect your PC to any device in a single-spur network. For a multi-spur network, SB needs to know if it is physically connected to the trunk or to a particular spur to ensure that it can correctly address devices. You can do this in System View by selecting the top of the device tree for a trunk connection or a particular gateway for a spur connection.
-
In System View, select the top-level
 project name (trunk) or
  gateway (spur) in the device tree (If no gateway is selected SB connects at the top level).
 -
Click
 Connection Settings to open the Connection Settings Editor.
 -
Click the button.
-
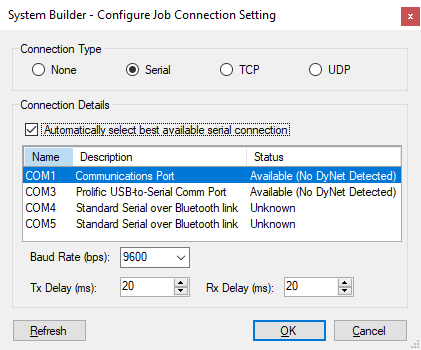
Select the Connection Type > Serial.
-
Select the COM port number for your USB port from the list.
-
Click the button.
-
In System View, select the top-level
 project name (trunk) or
  gateway (spur) in the device tree (If no gateway is selected SB connects at the top level).
 -
Click
 Connection Settings to open the Connection Settings Editor.
 -
Click the button.
-
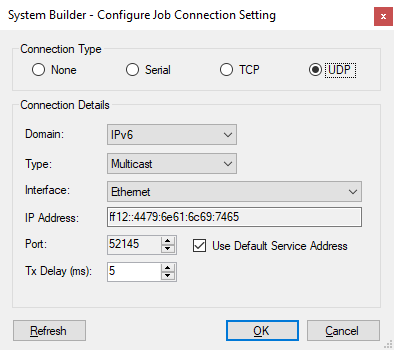
Select the Connection Type > UDP.
-
Select
 Use Default Service Address.
 -
Click the button.
-
Click
 Connect.
In multi-spur networks, the following icons show which part of the network SB is connected to:
-
 SB is currently connected to this trunk or spur
 -
 SB is connected at a level above this spur
 -
 SB is connected at a level below this trunk
 -
 SB is NOT currently connected to this trunk or spur
|
for security reasons, the UDP multicast default service address is currently deprecated. To connect to Ethernet devices, click the |
Each newly added device is displayed in System View, in a product folder under the top level for a single-spur network, or under the currently connected bridge/gateway for a multi-spur network. It is a good idea to add any bridges/gateways to your project before adding other devices.
Although devices are added to the tree under the current connection point, you can click and drag devices to other spurs.
You can add devices to SB in two ways:
![]() Insert Devices from Network (online)
Insert Devices from Network (online)
![]() Insert Device from List (offline)
Insert Device from List (offline)
Insert Devices from Network
System Builder has a network device discovery feature to find devices on the network. There are three ways to discover devices:
-
Sign-on
-
Search
-
Serial number
-
Click the
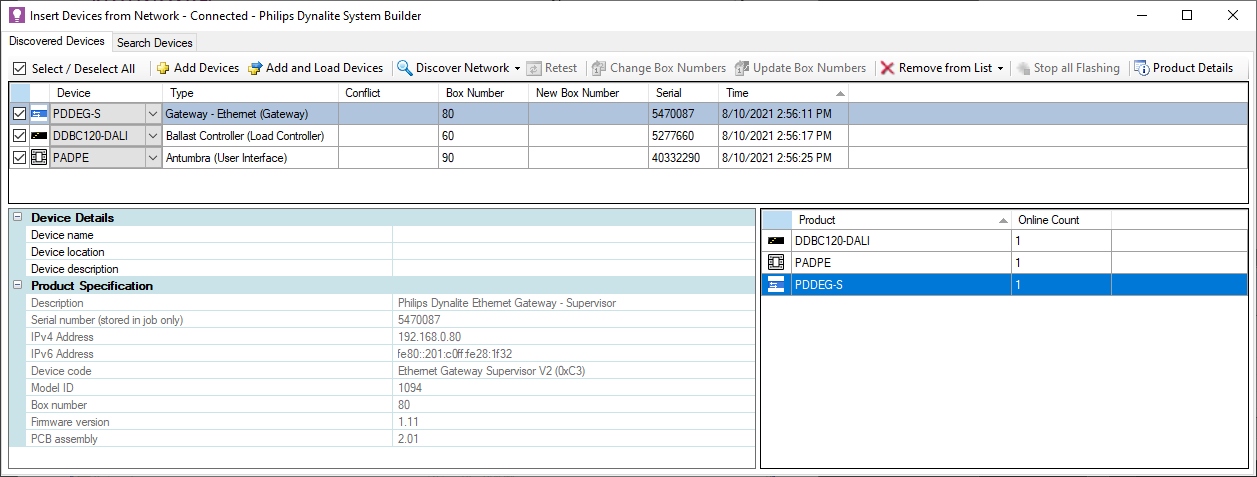
 Insert Devices from Network icon to open the Load Devices from Network window.
 -
Open the Discovered Devices editor.
-
Press the
 sign-on button on a device, or hold a UI panel button down for 5 seconds.
 -
Tick the
 checkbox next to each required device in the list.
 -
Click:
-
 Add Devices to add the device to the job.
OR -
 Add and Load Devices to add the device to the job and load the configuration data held in the device.
-
-
The device entry changes to green and the device is added to the job.
| If the search feature detects that two devices of the same type have the same box number, you will be prompted to change one of the device box numbers before you can add either device to your project. |
-
Click the
 Insert Devices from Network icon to open the Load Devices from Network window.
 -
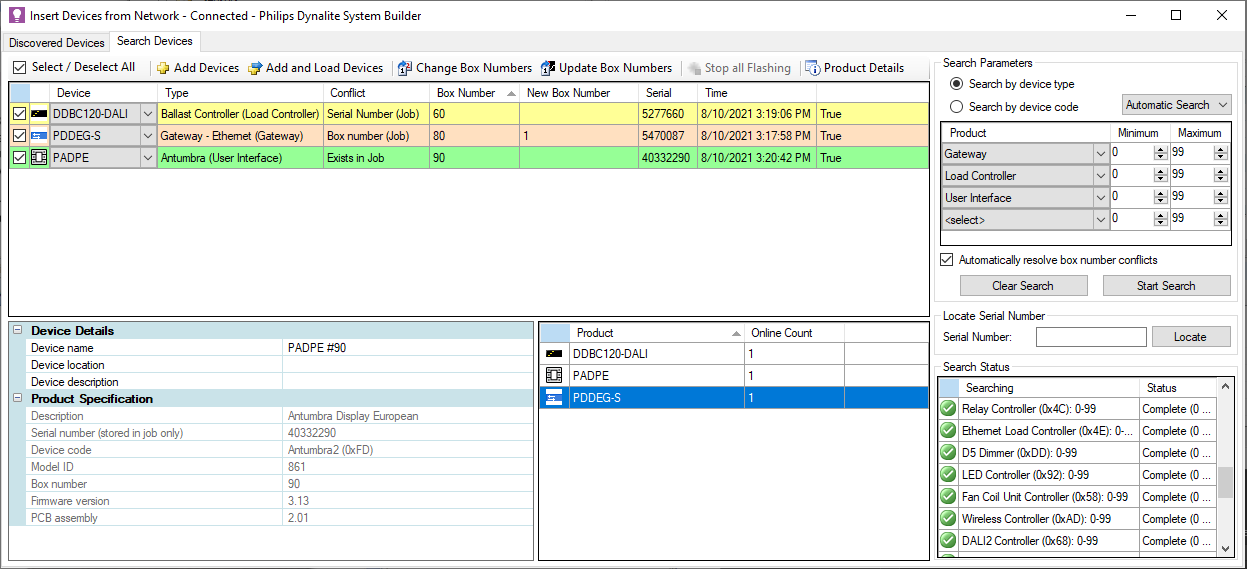
Open the Search Devices editor.
-
Select
 Search by device type or
  Search by device code.
 -
Select the required device types or device codes from the Product dropdown list.
-
Select the Minimum and Maximum box numbers to search for, if applicable.
-
Select
 Automatically resolve box number conflicts, if applicable.
 -
Press the button.
-
Tick the
 checkbox next to each required device in the list.
 -
Click:
-
 Add Devices to add the device to the job.
OR -
 Add and Load Devices to add the device to the job and load the configuration data held in the device (Tasks and events are automatically decompiled).
-
-
The device entry changes to green and the device is added to the job.
| If a device is found with same serial number in the job but has an unassigned box number then it will show Yellow with status “Matching serial number found”. |
Status Colors
The row color of a device found on the network indicates the following (slightly duller colors are used when the row is not selected).
| Color | Meaning |
|---|---|
|
The selected row |
|
No conflict |
|
Box Number conflict (with device in job or on network) |
|
Serial conflict (with device in job or on network) |
|
Exists in Job |
-
Click the
 Insert Devices from Network icon to open the Load Devices from Network window.
 -
Open the Search Devices editor.
-
Enter the serial number and click the button.

-
Open the Discovered Devices editor.
-
Tick the
 checkbox next to each required device in the list.
 -
Click:
-
 Add Devices to add the device to the job.
OR -
 Add and Load Devices to add the device to the job and load the configuration data held in the device.
-
-
The device entry changes to green and the device is added to the job.
Insert Device from List
Inserting from a list allows new devices to be added to the job. It is mainly used for offline commissioning. Devices inserted from Building View appear in both System and Building Views.
The ![]() Insert Device from List icon is available when one of the following is selected in the View window:
Insert Device from List icon is available when one of the following is selected in the View window:
-
 Job
Job -
 Plan
Plan -
 Distribution Board
 -
 Gateway
 -
 DALI-2 Load Controller
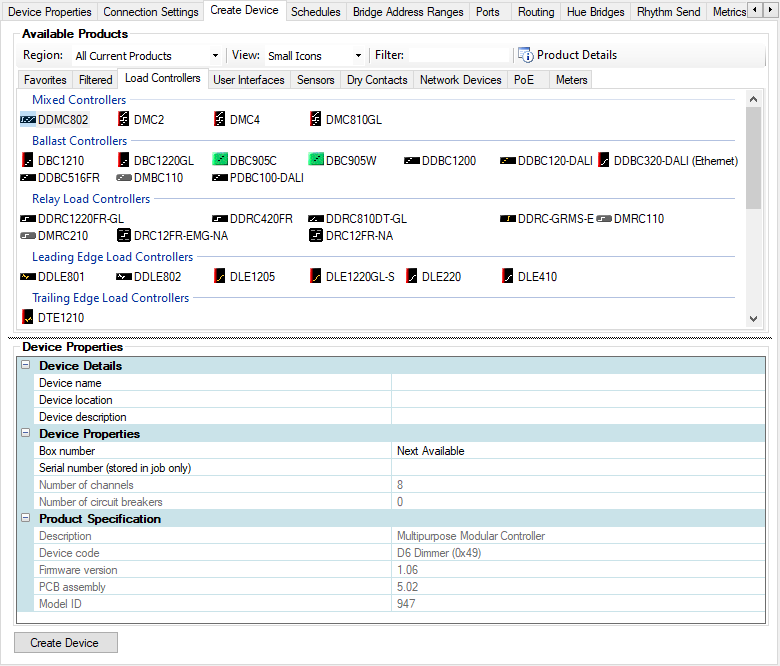
The Create Device editor contains three sections:
-
Available products – shows a separate page for each Product Type which is then further divided into different Product families.
-
Device properties – Property Editor for the currently selected product. It allows for custom device properties such as, device name, location and box number to be specified when creating a device.
-
Product details – the
 Product Details button displays a popup window with the details, description, and an image for the currently selected product.
-
Click the
 Insert Device from List icon to open the Create Device editor.
 -
Select your Region from the dropdown list.

-
Click the required product type tab.
-
Select the required device from the list of products.
-
Click the button, or double-click the device, or click and drag the device to the View window to add it to the job.
|
You can enter the device’s box number (if you have it) in the Device Properties section, or the Address column in System View. If pre-commissioning, ensure that the Box number is set to Unassigned. Once on-site, an appropriate box number can be set for the actual device. |
