Secure Access to System Manager
To establish secure access to System Manager from another server or PC, you must configure the following on the client machine:
User authentication
User authentication requires a username and password for each user. This enables users on their own PC to authenticate when prompted and gain access to secured Dashboard/API resources.
Add a user
-
Run Computer Management from the Windows Start menu or search bar.

-
Navigate to Local Users and Groups > Users. Right-click the Users folder and select New User
-
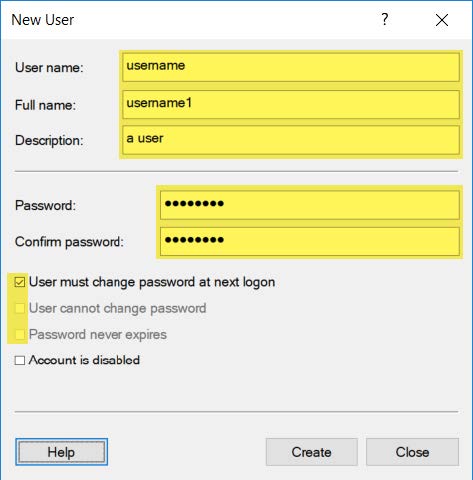
Enter new user details and access settings, click , then click .
-
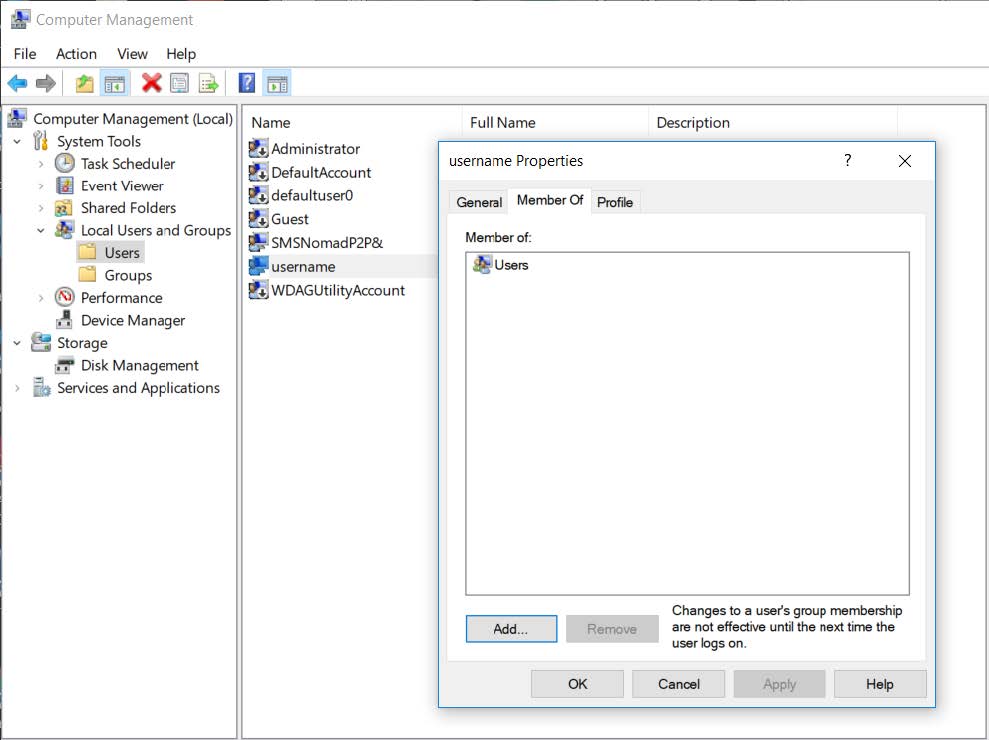
Right-click the new user, select Properties, and open the Member Of tab to confirm its Users membership.
Enable basic authentication
-
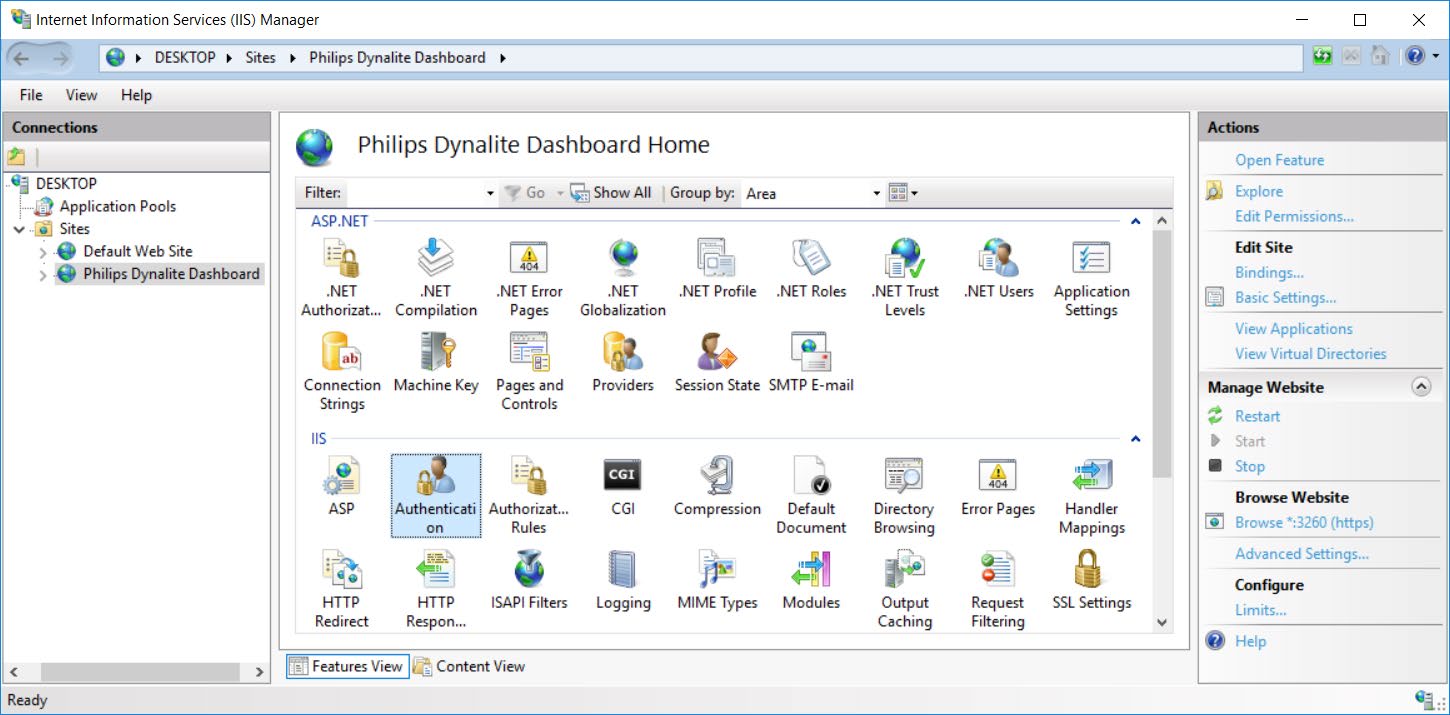
Open the Internet Information Services (IIS) Manager, select Philips Dynalite Dashboard (or relevant website), and double-click Authentication.
-
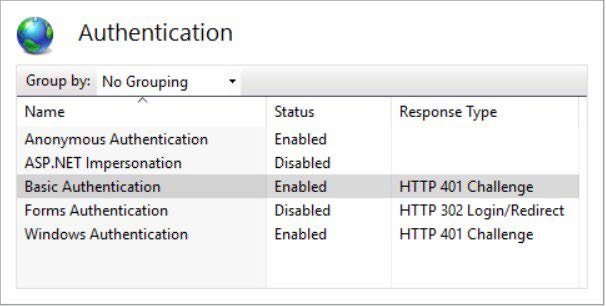
Select Basic Authentication and set its Status to Enabled.
-
Open
Web.configin your chosen text editor.
(Default location:C:/Program Files/Philips Dynalite/Dashboard/) -
Add the following configuration settings within the system.serviceModel.
First perform a search, as the content may already be in the file. <bindings> <webHttpBinding> <binding> <security mode="Transport"> <transport clientCredentialType="Basic" /> </security> </binding> </webHttpBinding> </bindings> -
Save the file (you may need to be running your IDE as Administrator to make the change).
HTTPS Certificate
To enable a secure HTTPS connection to System Manager, you need to create an SSL/TLS certificate.
Create an SSL/TLS certificate:
-
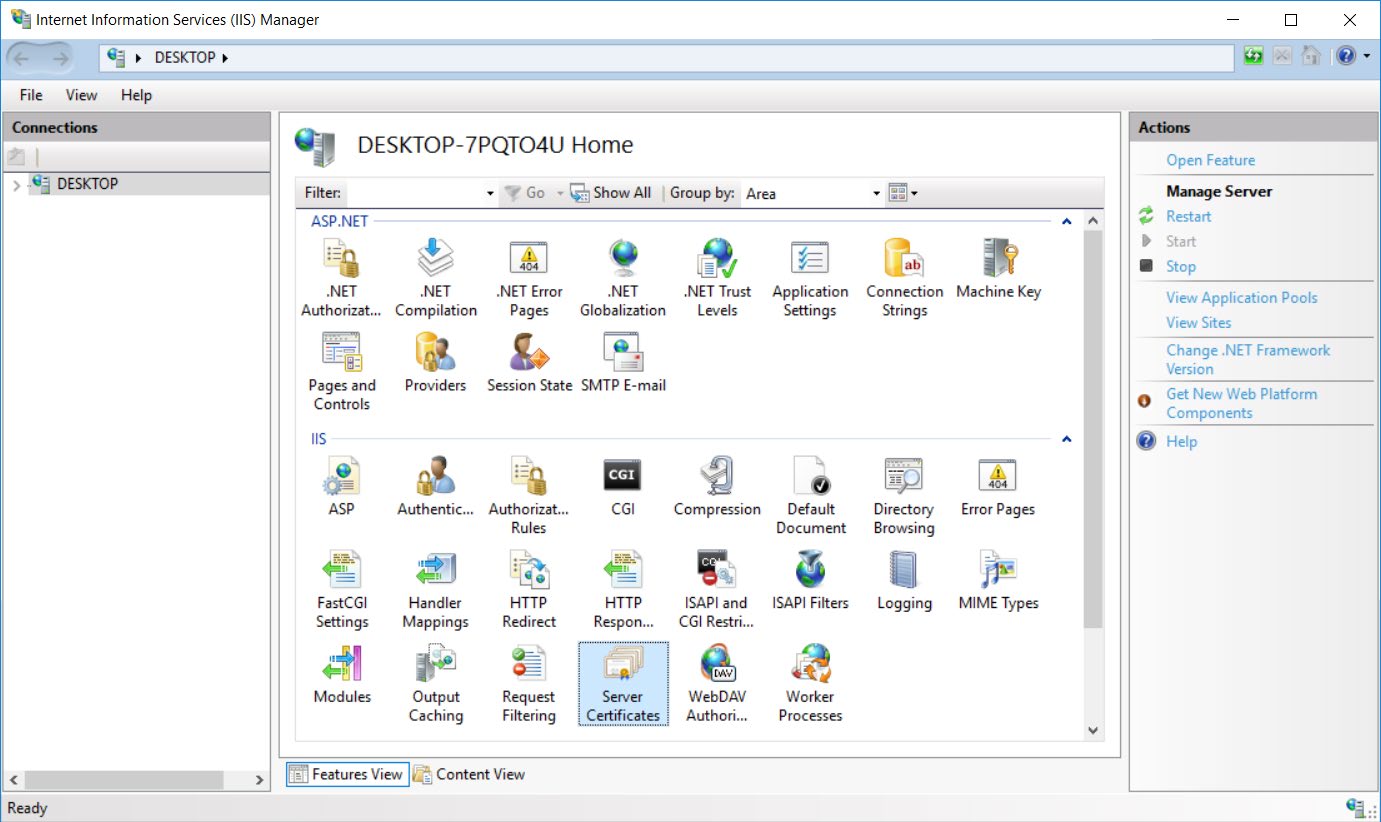
In the Internet Information Services (IIS) Manager, select the root item and double-click Server Certificates.
-
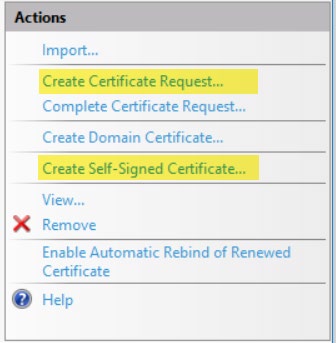
Select one of the following Actions:
-
Create Certificate Request to begin the process of registering for a proper qualified SSL/TLS certificate.
-
Follow the IIS certificate authority request process.
-
OR
-
Create a Self-Signed Certificate to prepare a locally validated certificate for use.
(This option will display a "Not secure" warning when logging in to the website.)-
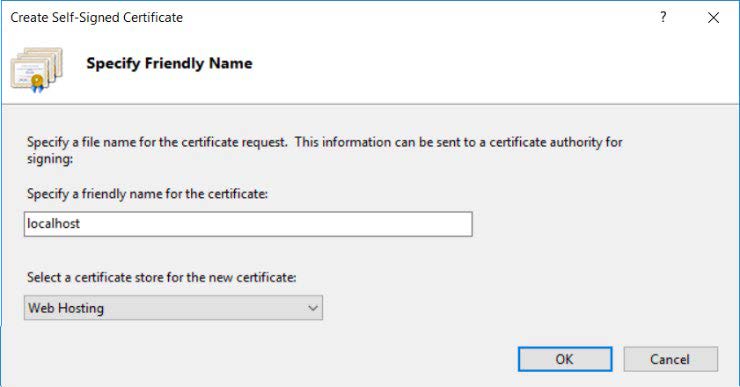
Specify a friendly name for the certificate (e.g. localhost) and Select a certificate store (e.g. Web Hosting), then click .
-
Your new certificate should now be issued.

-
-
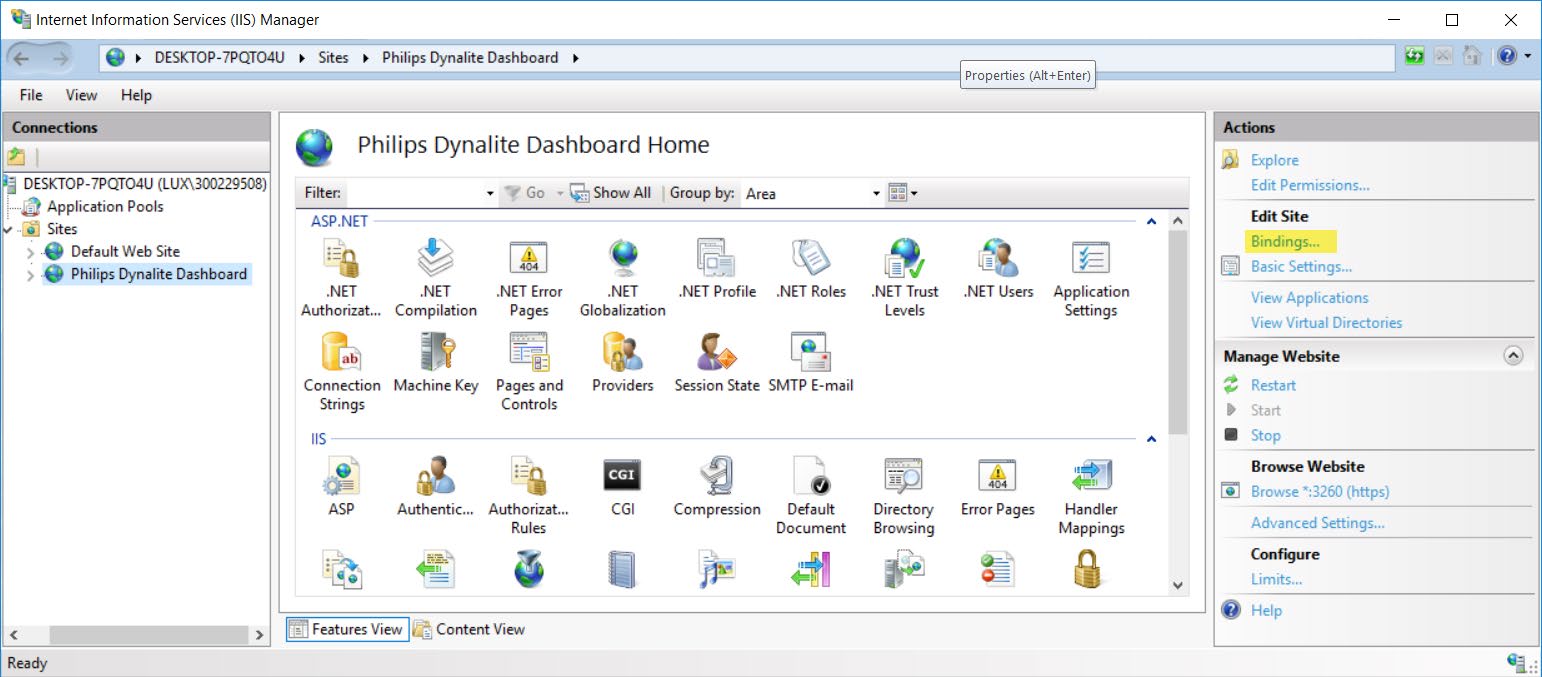
To bind the new certificate to the Dashboard site (or relevant website), select Philips Dynalite Dashboard (or relevant website) and click Actions > Edit Site > Bindings…
-
Click to create a new site binding.
-
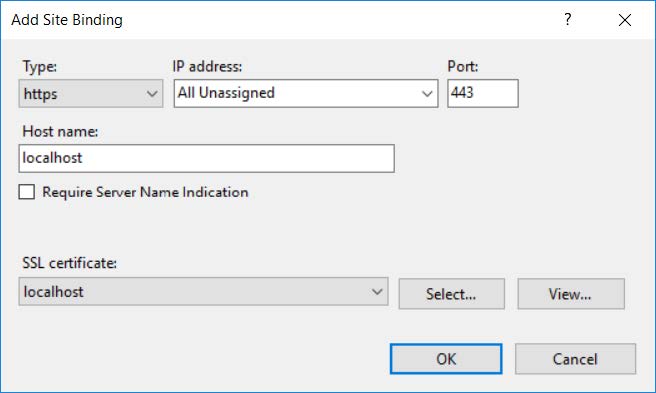
Change the Type to https and configure the IP address, Port, and Host name to suit your network setup.
-
Select the SSL certificate you have created from the list of available SSL/TLS certificates and click .
-
Once created, click to return to the main IIS management page.
-
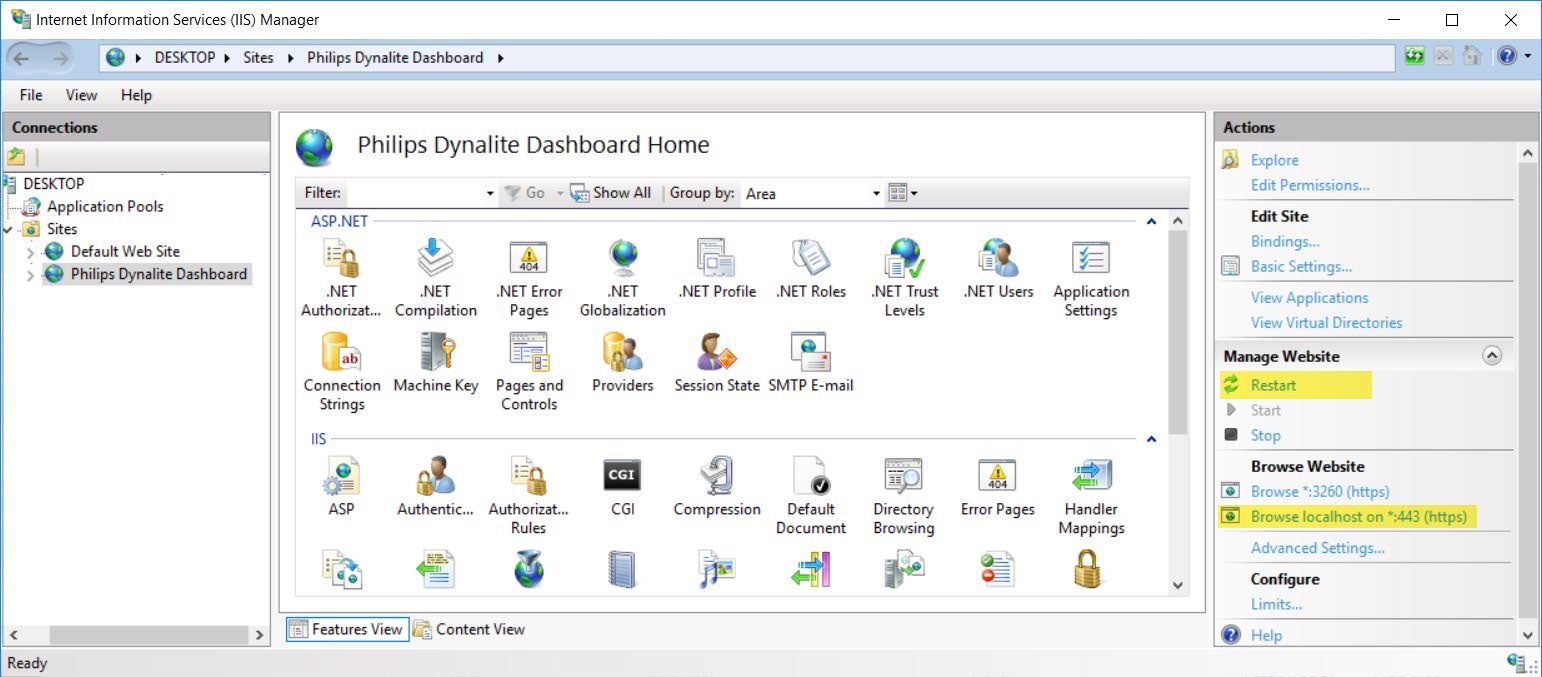
To ensure the new settings have been adopted, click Manage Website > Restart panel.
-
Click Browse <provided host name> on <provided IP Address>:<provided Port> (https) to launch the website.
-
For a self-signed-certificate, you may need to click Advanced to proceed past the browser warning and view the website.