System Manager Installation
The following components are required for System Manager API access. For detailed System Manager software installation refer to the System Manager installation Guide
| You must install the PostgreSQL Data Access (DA) database and configure Internet Information Services (IIS) before installing the other System Manager components. |
Install PostgreSQL database
The Data Access service requires the PostgreSQL database to be installed. Download the installation package from https://www.postgresql.org/download/windows/
-
Right click the postgreSQL setup file from an explorer window and select Run as administrator to open the PostgreSQL Setup Wizard.
-
Click in the postgreSQL Setup Wizard.
-
Click for Installation Directory.
-
Click for Select Components.
-
Click for Select Data Directory.
-
Enter the database superuser Password and Retype password.
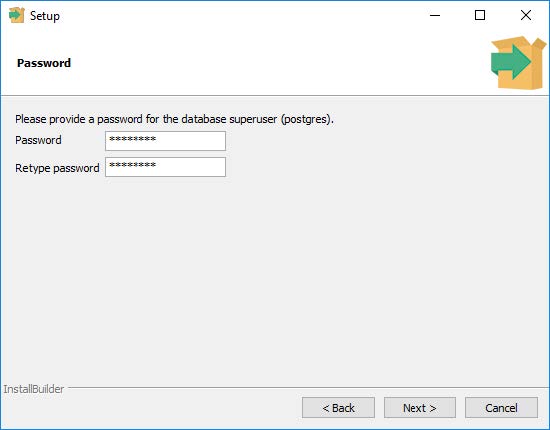
The DA password is encrypted, so store a copy in a secure location for future reference.
The password will be required later when installing System Manager. -
Click for Select Port number.
-
Select your Language and Location.
-
Click for Display pre-installation summary.
-
Click for Ready to begin installation.
-
Untick the Launch Stackbuilder checkbox and click .
Configure IIS
-
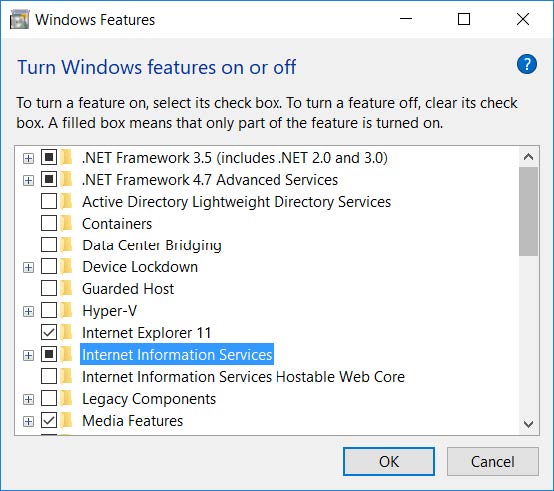
On the PC that will host the System Manager server, open Windows Control Panel > Programs and Feature > Turn Windows features on and off.
-
Enable Internet Information Services
-
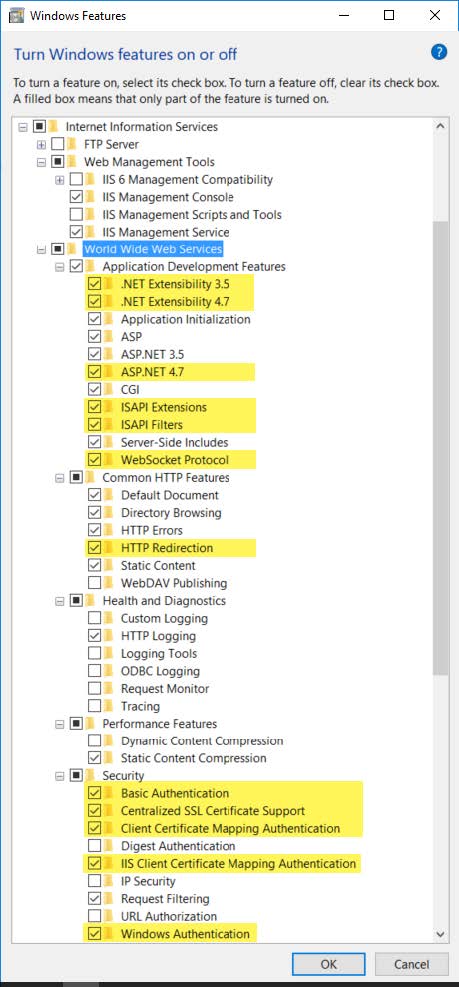
Enable these additional features:
Install System Manager prerequisites
Right-click the System Manager Prerequisites setup file and select Run as administrator.
(e.g. Philips.Dynalite.System.Manager.Prerequisites_v1.2.0.0.exe)
Once the prerequisites are installed, the wizard ends automatically.
Install System Manager
-
Run the Philips Dynalite System Manager (
.exe) install file. -
When installing the System Manager software, select the Data Access checkbox in the wizard and click next.

-
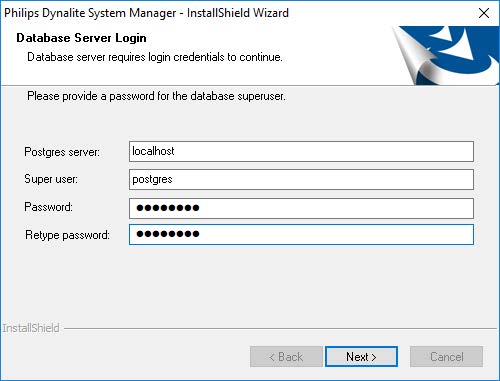
During installation, enter the password previously created for the postgreSQL database super user account and click next.
-
Enter the same password to create the Database name and User name and click next.
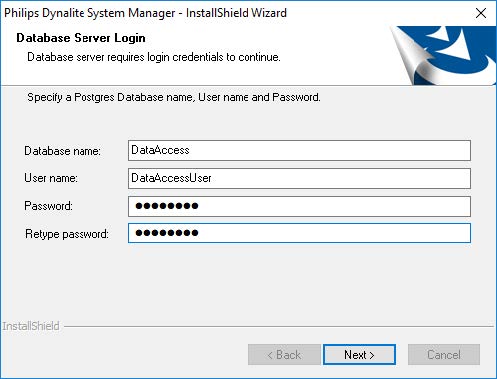
-
Click OK after the wizard has successfully created the Data Access database and user.
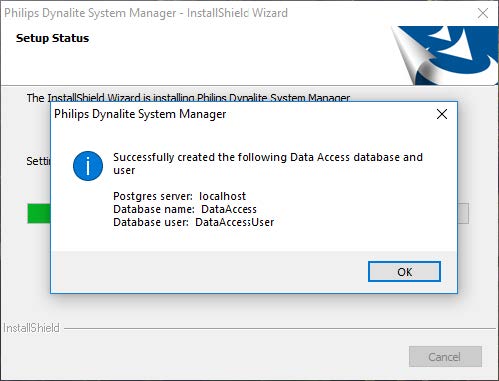
The wizard continues to install the remaining System Manager components.
Request licenses
Depending on your project requirements. you may need to request one or more software licenses:
-
Standard System Manager license
-
Data Access license.
-
After System Manager is installed, run the
 System Manager Configuration tool.
 -
Click Request API License. Red fields are mandatory.
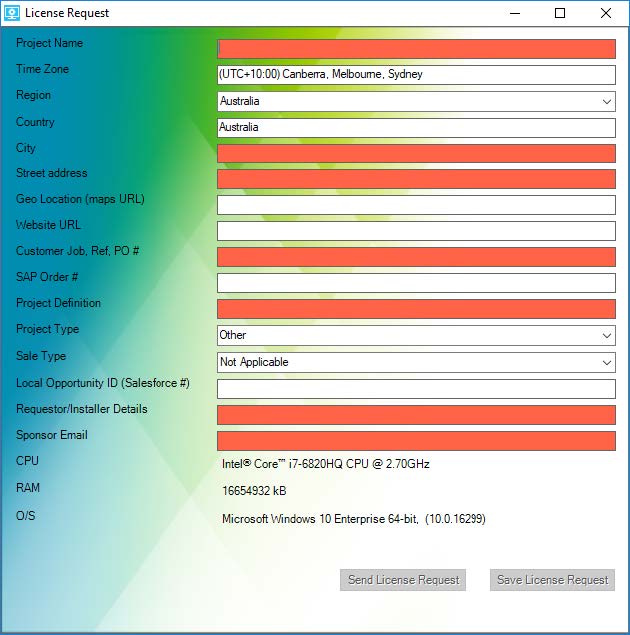
-
Enter the site details and click . This uses the standard email application on the computer to generate an email to support.controls@signify.com. The Philips Dynalite support team will reply with your license file within 24 hours.
If no email client is installed, click the button to save the license request to a file and send later. -
Click .
-
Browse and select the license file (
System Manager.license). -
Click . The license information is displayed at the bottom of the System Manager Configuration window.
Configure Site settings
-
Run the
 System Manager Configuration tool.
 -
Click .
-
Select Data Access.
-
Tick the Enable Dashboard and Enable Web API checkboxes.
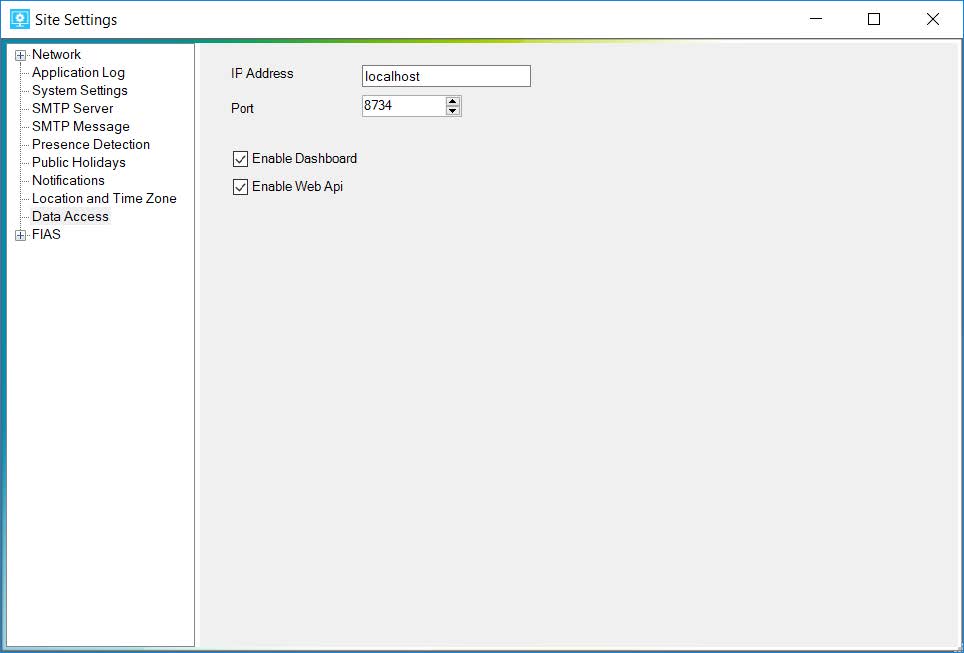
-
Click to complete the System Manager configuration.
-
In Windows, open the
 System Manager client.
| If you are setting up the Lighting Dashboard, set System Settings > Behaviour > Enable Trending to True. |